- Continue Shopping
- Your Cart is Empty
Make One Gallon of Homemade Beer with Our DIY Kit

What You'll Need
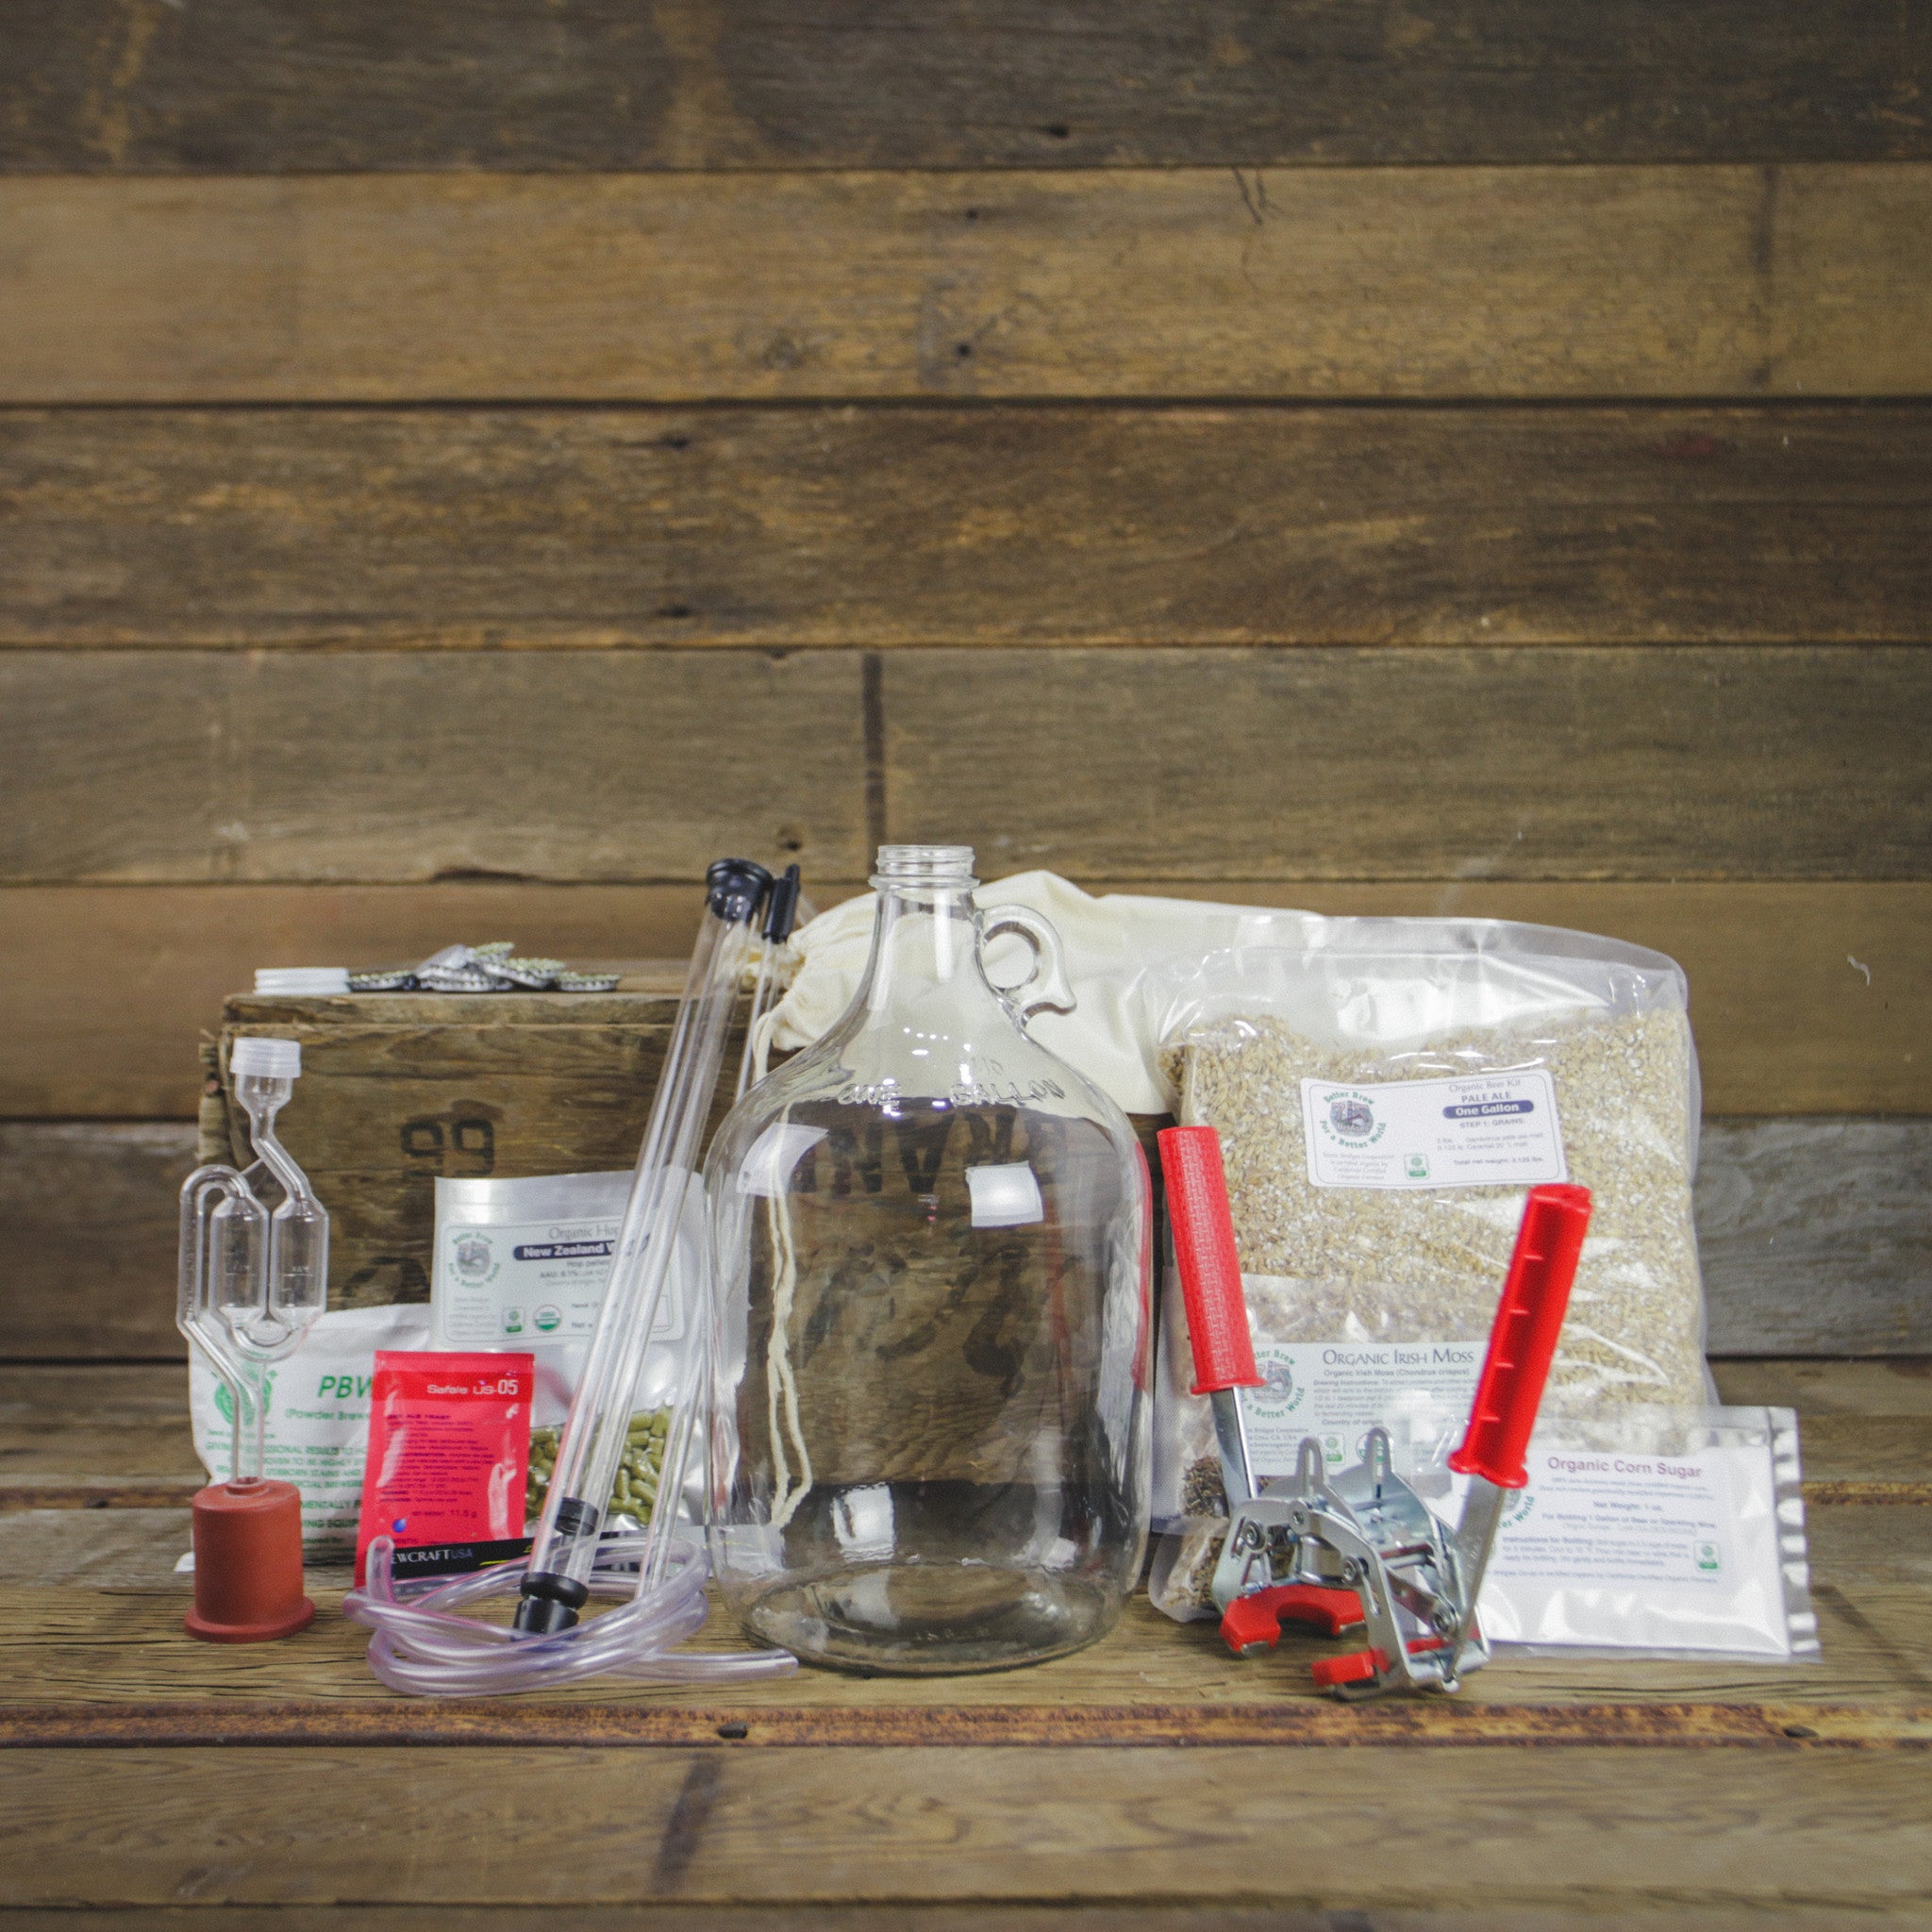
Our 1 Gallon Kit Includes:
- 1 Organic Pale Ale ingredient pack
- 1 4 oz. packet PBW powdered cleaner/sanitizer
- 1 one gallon glass jug with cap
- 1 musting cap with airlock hole
- 1 airlock
- 1 stick on thermometer
- 1 one oz. organic corn sugar
- 1 bottle filler
- 3 feet plastic tubing
- 1 Auto Siphon racking cane
- 1 Bottle capper
- 10 Bottle caps
- Recipe and instructions
- FREE Grain Steeping Bag
What else do you need?
- 1 Brew pot (2 gallons or larger)
- 1 additional pot for boiling 3⁄4 gallon of water
- Stainless steel spoon
- Thermometer (range of 60 °F-200 °F)
- Funnel
- Enough ice to fill your sink
- One quart size jar for off gassing
- A stainless steel bowl to mix your cleaner/sanitizer
- 10 bottles for your finished home brew (start saving those empties!)
- A small saucepan to dissolve bottling sugar
- A stainless steel bowl to mix your cleaner/sanitizer
- Recommended: A good home brew book
Directions for our One Gallon All Grain Beer Kit
 1) Prepare and Sanitize Your Equipment
Wash and sanitize your equipment prior to beginning. Follow instructions on your pack of PBW sanitizer on mixing and get a good home brew book to guide you on sanitation. Mix a small batch of PBW sanitizer in a stainless steel bowl following the instructions on your PBW packet.
You don't need to use the entire packet of PBW for these first steps. Save some for steps further down the line and for future batches of home brew!
FAQ: What is the difference between washing and sanitizing?

2) Begin the Mash
Heat 3⁄4 gallon of water in your washed brew pot to 160°F then turn off the heat.
Pour your grains into your grain bag, close the bag and soak in the water at 150 °F for 40-60 minutes. Make sure all of the grains are submerged in the water. The longer you soak the grains the stronger tasting your beer will be.
Keep the water temperature at 150°F. You may need to turn the heat back on temporarily to do so.

3) Heat Additional Water
In your second washed pot, heat 3/4 gallon of water to 170°F.
4) Making the "Wort"
After your grains have soaked, lift the grain bag over your brew pot (you can use a colander to do this) and open the bag exposing the grains.
Pour the 3⁄4 gallon of 170 °F water over the grains (grab a friend to help!), washing the fermentables out into your brew pot. This is now called your wort.
Squeeze the bag to get as much of the remaining liquid from the grains as you can into your brew pot. Be careful it’s hot!
TIP: Feed your "spent grains" (leftover soaked grains) to your chickens or add them to your compost pile!
5) Start the Brew
Bring the wort to a rolling boil (the wort is boiling rapidly with lots of bubbling).
6) Add the Hops
At a rolling boil add 5 grams of Wakatu hops (bittering) and boil for 40 minutes. Each section of hop pellets in the kit is 5 grams.
7) Add More Hops and Irish Moss
After 40 minutes add 5 more grams of Wakatu hops (flavor) and the Irish moss flakes. Boil for 15 minutes.
8) Add Final Hops and Finish
After that 15 minutes add the remaining 5 grams of Wakatu hops (aroma) and boil for 5 minutes. Turn the heat off.
9) Cool the Wort
Cool the wort rapidly by surrounding your pot in an ice bath (in a sink works great). With your stainless steel spoon, stir continuously until the wort comes to 65 °F-75 °F. The faster you cool the worth here, the less chance there is for contamination.
SAFETY NOTE: Sanitation becomes extremely important at this point. These steps are considered “after the boil”. Any equipment that touches your brew after it has been boiled should be both washed and sanitized using your PBW sanitizer solution.
10) Fermentation
Transfer the chilled wort to your sanitized 1-gallon glass jug using your sanitized funnel. There is no need to strain the wort.
11) Add the Yeast
Add 1⁄2 the yeast packet directly into the jug, put on your sanitized cap and shake to dissolve the yeast and add oxygen to your brew. Store the other half of the yeast packet in the refrigerator for a later batch of home brew.
12) Add Spring Water if Needed
During the boil you may have experienced some (or a lot!) of evaporation. Fill the remainder of your jug with room temperature (65°F-75 °F) spring water to make up 1 gallon. (The “ONE-GALLON” stamped on the jar marks the 1 gallon point).
NOTE: If you are on city water, do not use tap water for this step. Chlorinated water can affect the taste of your final brew.
13) Let the Beer Burp for One Week
Follow these steps exactly to avoid your stopper falling into your jug.
- Insert one end of your sanitized plastic tubing into the hole in the rubber stopper.
- Insert your sanitized rubber stopper into the opening of your glass jug.
- Insert the other end of the plastic tubing into a quart jar of PBW sanitizer solution.
This allows your beer to “burp” for one week and will prevent messy explosions. This is called “off gassing”. You may need to use a rubber band or some tape to hold the tubing inside the jar if it seems to be popping out on its own.
 14) Ferment One Week, Monitor Temperature
Stick the thermometer on the outside of your bottle towards the middle so you can monitor the temperature. Ferment in a cool, dark place for 1 week at 60°F-70 °F.
15) Install the Airlock
After one week of your beer off gassing into the jar, you may add your airlock. Remove the plastic tubing from the rubber stopper and sanitize (the stopper) again.
Insert your sanitized airlock into the sanitized rubber stopper, then place both into the opening of the jug. You must fill the airlock with PBW sanitizer solution first.
16) Ferment One Additional Week
Ferment in a cool, dark place for one more week at 60°F-70 °F.
17) Prepare for Bottling
Sanitize 10 bottles and caps, your Autosiphon, bottle filler and plastic tubing, and a funnel.

18) Add Sugar
Boil your corn sugar in 1/2 cup of water for 5 minutes in a small saucepan to dissolve.
Cool the sugar solution to 70 °F and poor into your 1 gallon jug of beer using your funnel. Gently swirl to mix well. Try not to disturb the sediment in the jar too much.

19) Fill Bottles with Autosiphon
Attach one end of your plastic tubing to the AutoSiphon and one end to your bottle filler. Place the tip of the bottle filler inside your first bottle.
Place the rubber end of the AutoSiphon into the 1-gallon jug of finished home brew. If the sediment on the bottom of your jug is higher than the rubber at the bottom of the AutoSiphon, hold the bottom of the siphon in the clear portion of the beer to start as illustrated on the AutoSiphon instructions.
Follow instructions on the AutoSiphon and bottle filler to fill bottles.
TIP: It is good to practice this with water first before trying with your beer to avoid wasted brew.
20) Cap the Bottles Immediately
Cap immediately to avoid contamination. Follow instructions on bottle capper.
21) Store and Enjoy Your Homemade Beer
Store the bottled beer at room temperature (70 °F) for the first few days, then in a cool dark place (55°F-65 °F) for 1-3 weeks. Your beer is ready to drink when it is clear and nicely carbonated. Enjoy!
This Recipe Features our DIY 1 Gallon All Grain Beer Kit
Over to You
It’s part of our mission here at Mountain Feed to help you make delicious, sustainable, homemade food more often. Stop by and say hello on Facebook, Twitter, Instagram or Pinterest. Or, as always, you can do it the old fashioned way and come by the store to speak with one of our in-house experts.

 14) Ferment One Week, Monitor Temperature