- Continue Shopping
- Your Cart is Empty
Curing Olives: Fermentation Method

What You'll Need
Equipment
- rolling pin or sharp knife
- latex gloves (optional)
- large jar or crock
- colander
- pickling weights
Ingredients
for Fermentation
- about 1 quart fresh, raw red or brown olives
- 3 quarts fresh water, divided
- 3 batches Salt Brine: 3 Tablespoon salt to 1-quart water, plus another half-batch if necessary
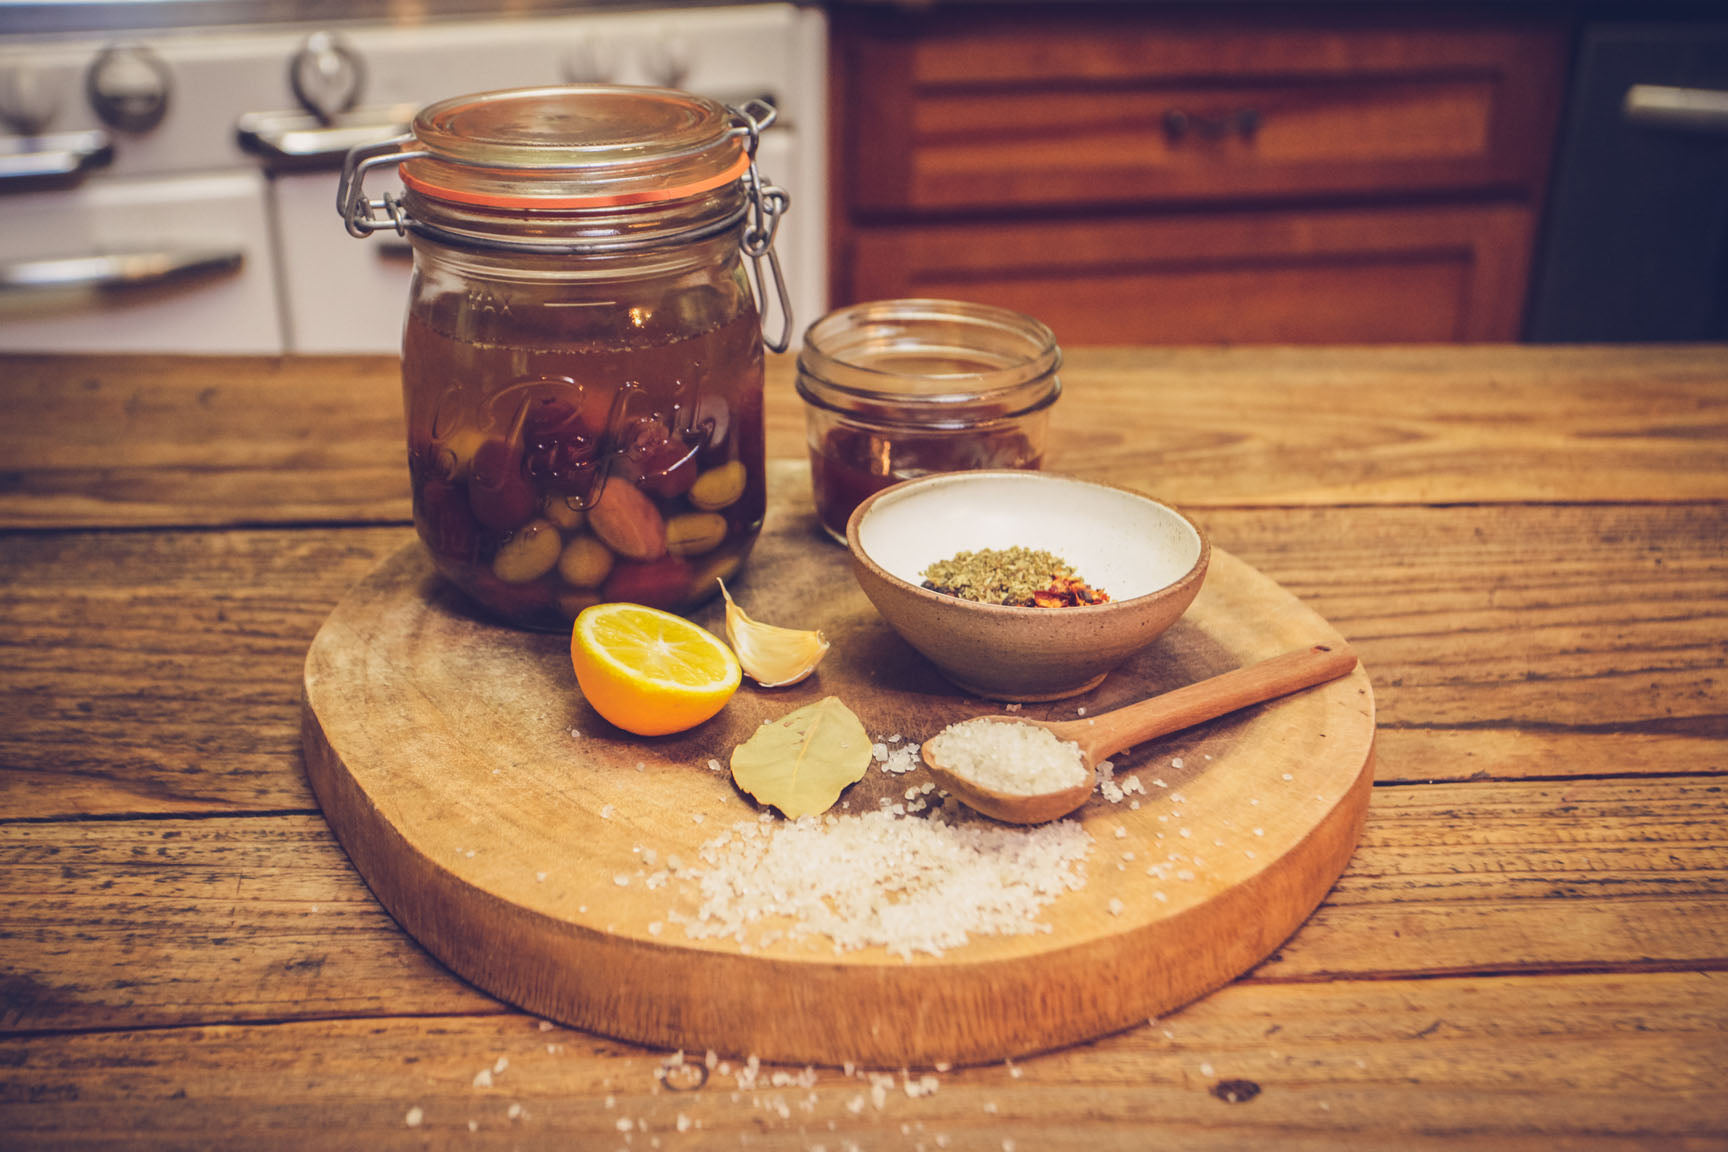
Ingredients
for Flavoring
- 1/4 cup red wine vinegar
- 1/2 whole lemon, rind, zest, and flesh
- 1 small garlic bulb
- 1 bay leaf
- 1 tsp black peppercorns
- 1/2 tsp dried oregano
- 1 tsp red pepper flakes
Last year, our olive trees bore an enormous crop; this year, not so much this year. Olives tend to be alternate bearing, meaning that they bear heavily one year, and very lightly the following year. Luckily, they don’t all follow the same schedule, so this time of year is a good one to get your hands on some olives and begin this lengthy process. Worth the wait for delicious results!
For this Kalamata style olive, we used a combination method of a water brine and a salt brine method, sourcing information from websites such as Nourished Kitchen curated by the author of The Nourished Kitchen: Farm-to-Table Recipes for the Traditional Foods Lifestyle Featuring Bone Broths, Fermented Vegetables, Grass-Fed Meats, Wholesome Fats, Raw Dairy, and Kombuchas and The Spruce. The water brine method, Mc Gruther tells us at the Nourished Kitchen, results in an increased amount of oleuropein, an antioxidant thought to boost the immune system. Oleuropein is also the source of the incredibly bitter flavor of unripe olives, another instance of the tendency for bitter flavors to be beneficial in small doses. Curing neutralizes this compound somewhat, retaining a small amount of balancing bitterness while creating a salty, flavorful olive. Kalamata olives are the most commonly known water-cured olives, made from fresh red-brown or black-ripe stage.
While olives can be harvested at all stages of ripeness (green olives are just unripe black olives, although some varieties are better at the green stage than the black, and vice-versa) this recipe calls for the olives to be harvested at the red-brown or black-ripe stage—just about now, in other words, as most trees in our area have already passed the green-ripe stage. 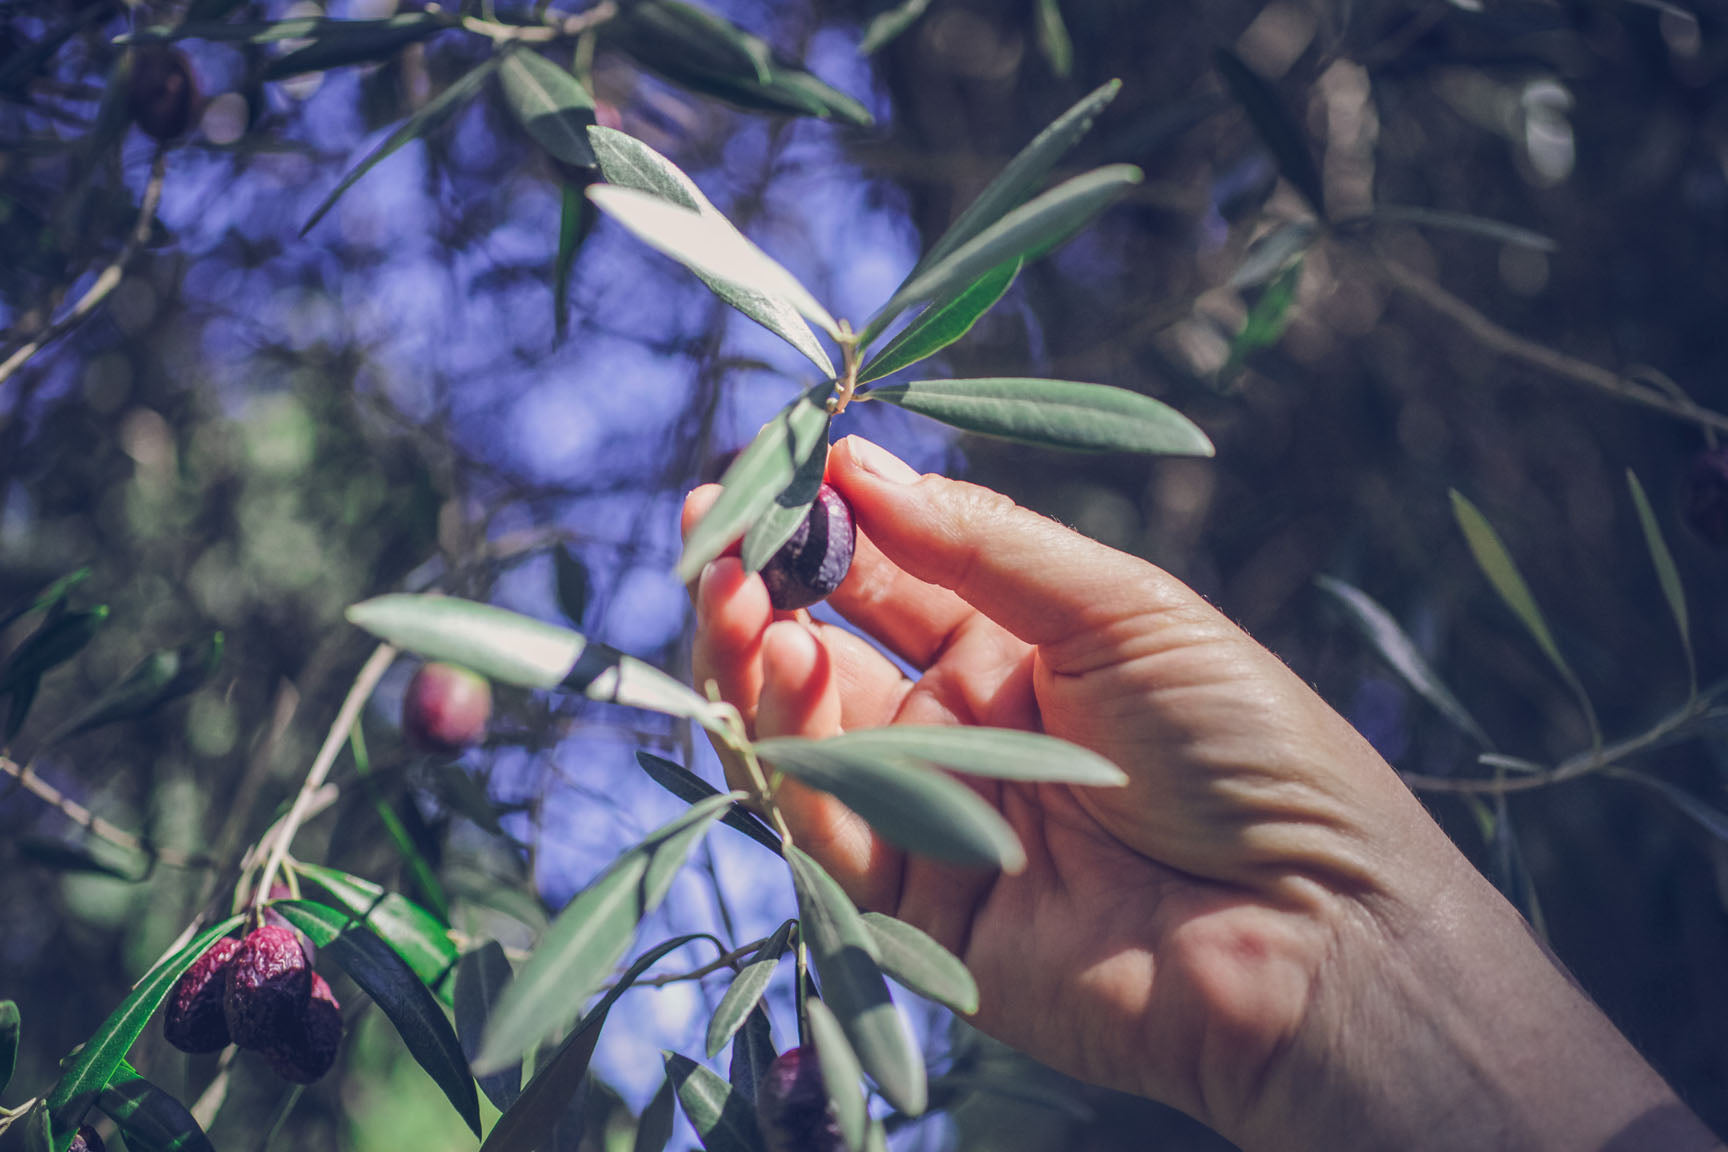
Once the fermentation has finished, a process of several weeks or even months, the olives are then placed in a vinegar brine, sometimes with added oils and spices. There are a lot of ways to customize the flavor once the flavor is complete, tailoring the spice blend to suit your individual preference. A large batch of cured olives can also be broken down into smaller batches after fermentation to experiment with different flavors. Lemon, oregano, thyme, red pepper, and garlic are all excellent flavors to incorporate into your olive brine. Let your taste buds guide you!
The salt brine here closely resembles the ratio of salt in seawater-and no wonder! In ancient times, a mesh bag containing olives might have been lowered into the ocean and left to marinate there. I like to imagine the gray-green olive trees swaying on yellow hills, while their fruit steeps in the salty green sea below.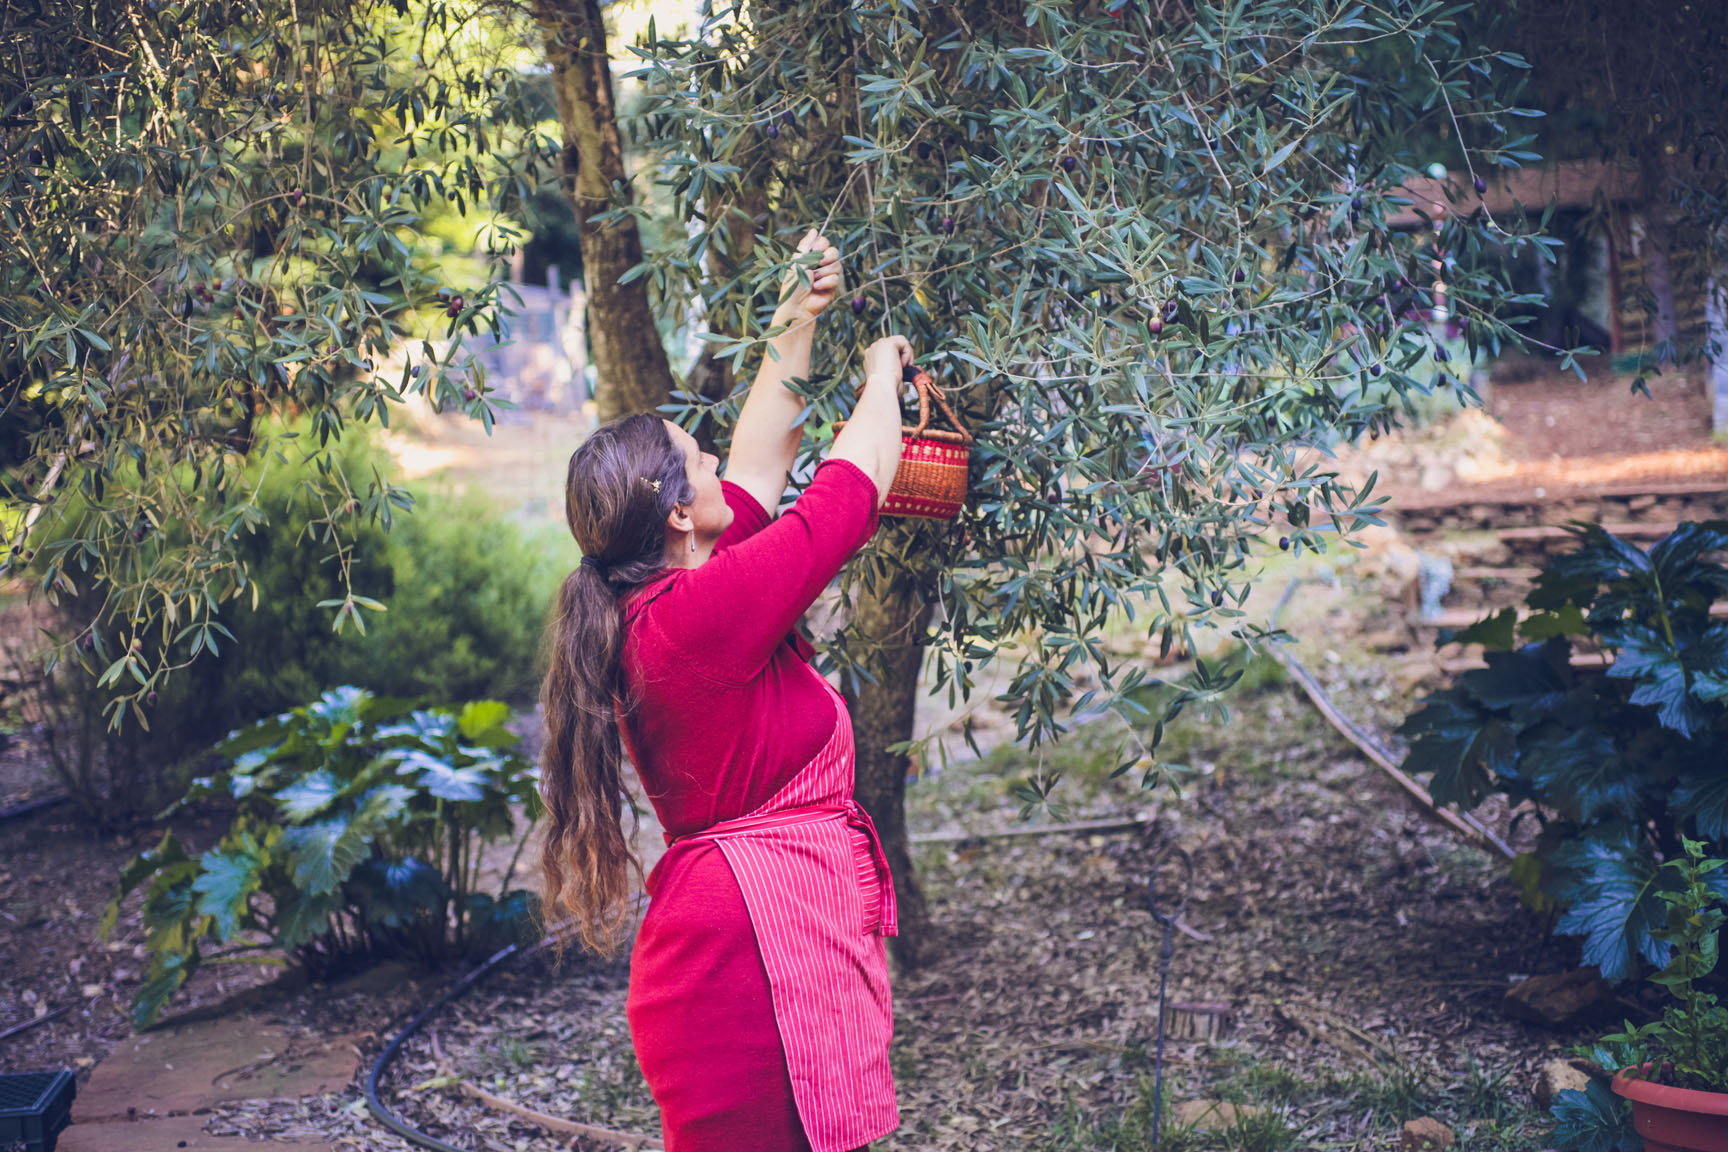
 Directions
Clean the olives, removing any stems or attached leaves, and discarding blemished fruit. Directions
Bruise the olives with a rolling pin, or use a sharp paring knife to score the side of each olive.
 Either way, the goal is to break the seal of the skin so that the brine can penetrate into the center of the olive. The olives may leak a foamy or milky juice, which when it oxidizes, stains the skin black. Wear gloves if this is likely to bother you.
Place the scored or bruised olives into a non-reactive vessel, such as a large jar or crock.
 Cover the olives with cool, fresh, unchlorinated water, and place a lid on the container. If necessary to keep the olives beneath the surface, use a weight to keep the olives submerged.
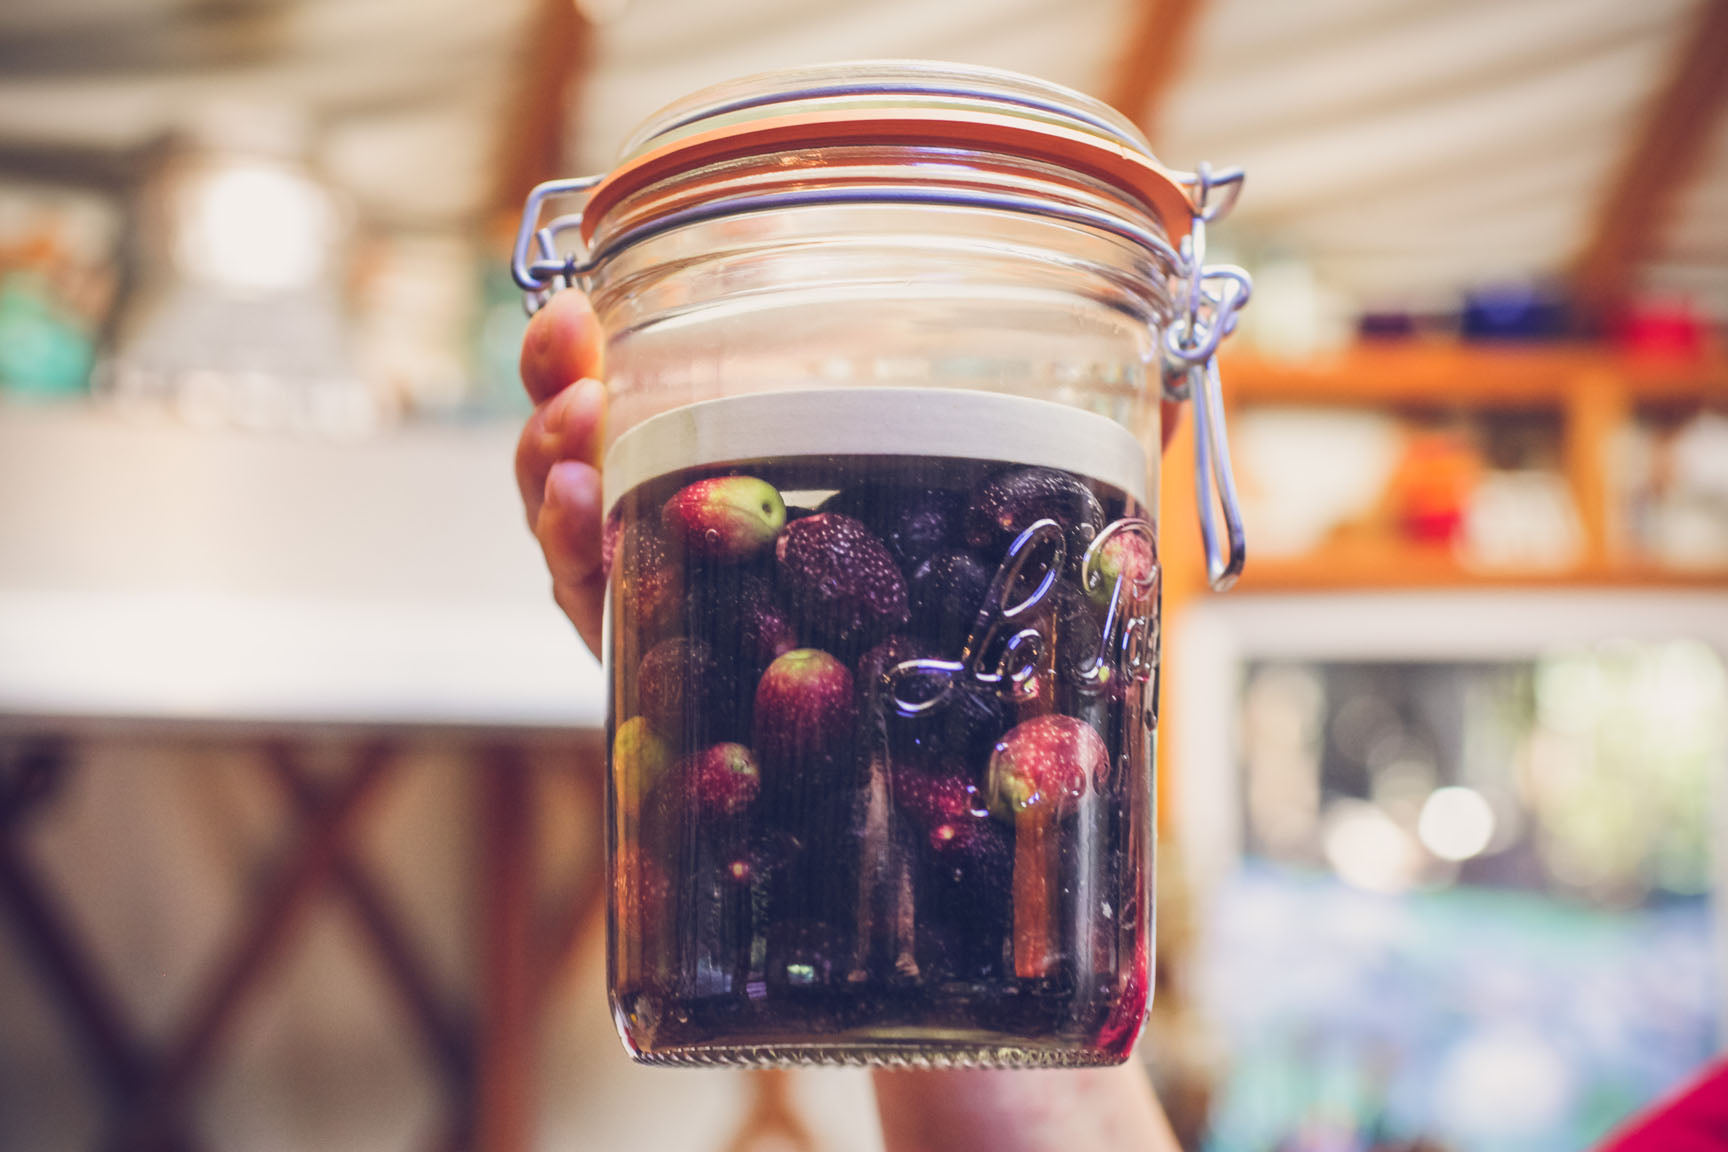
The next day, replace the water with fresh water. You may see oil that has floated to the top of the liquid, which is fine, all just a part of the process.
Change the water again the next day.
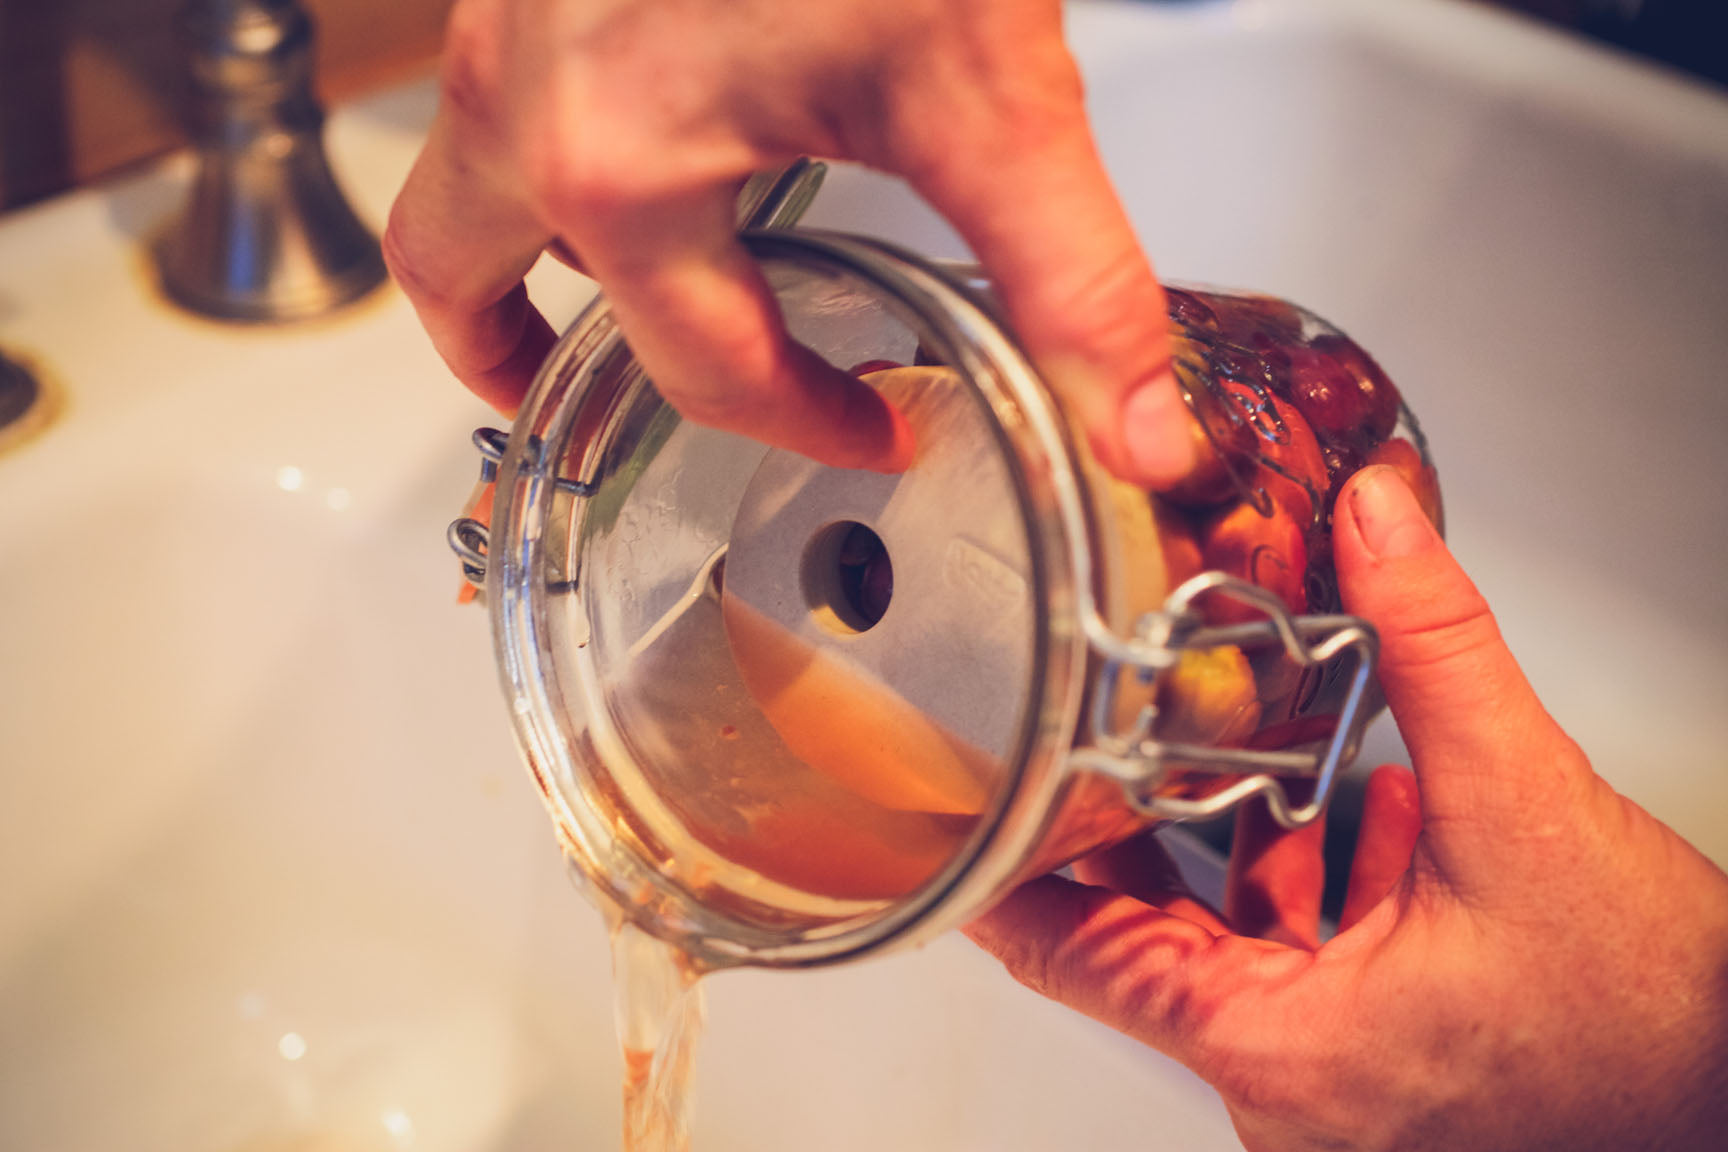
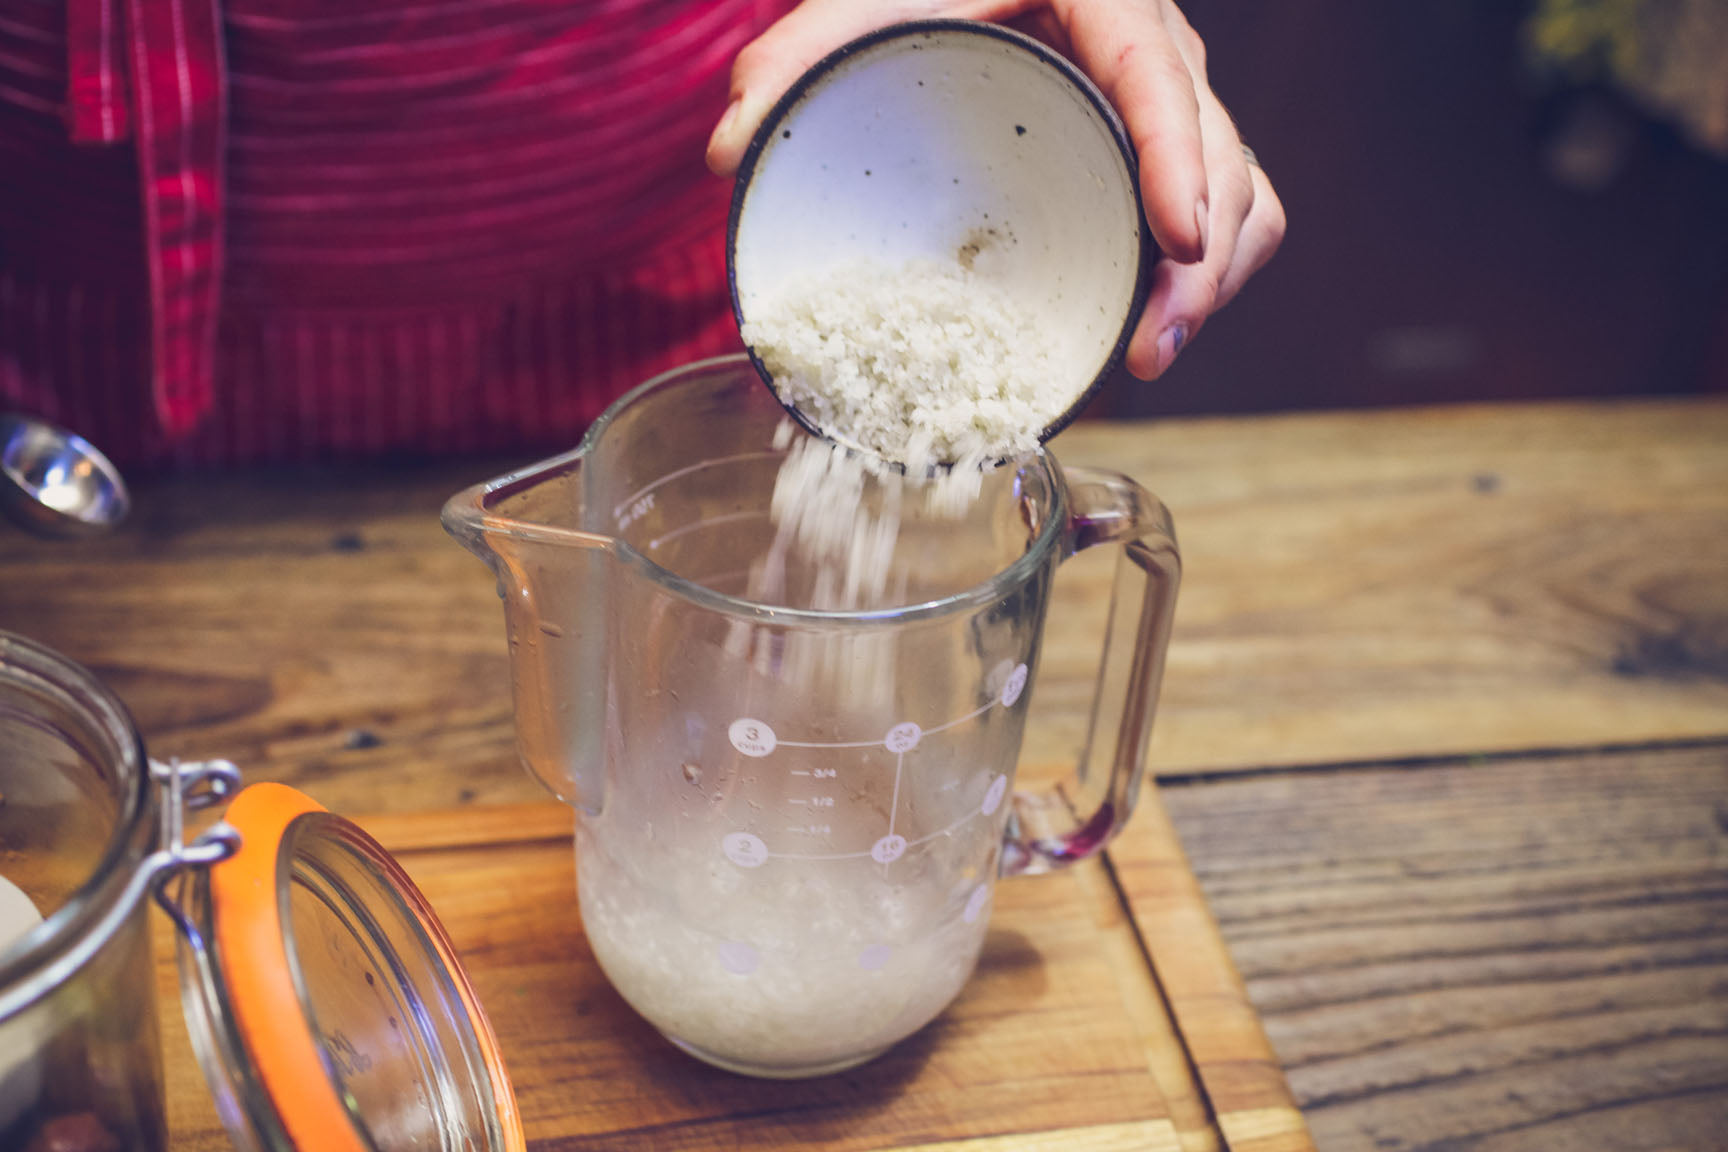
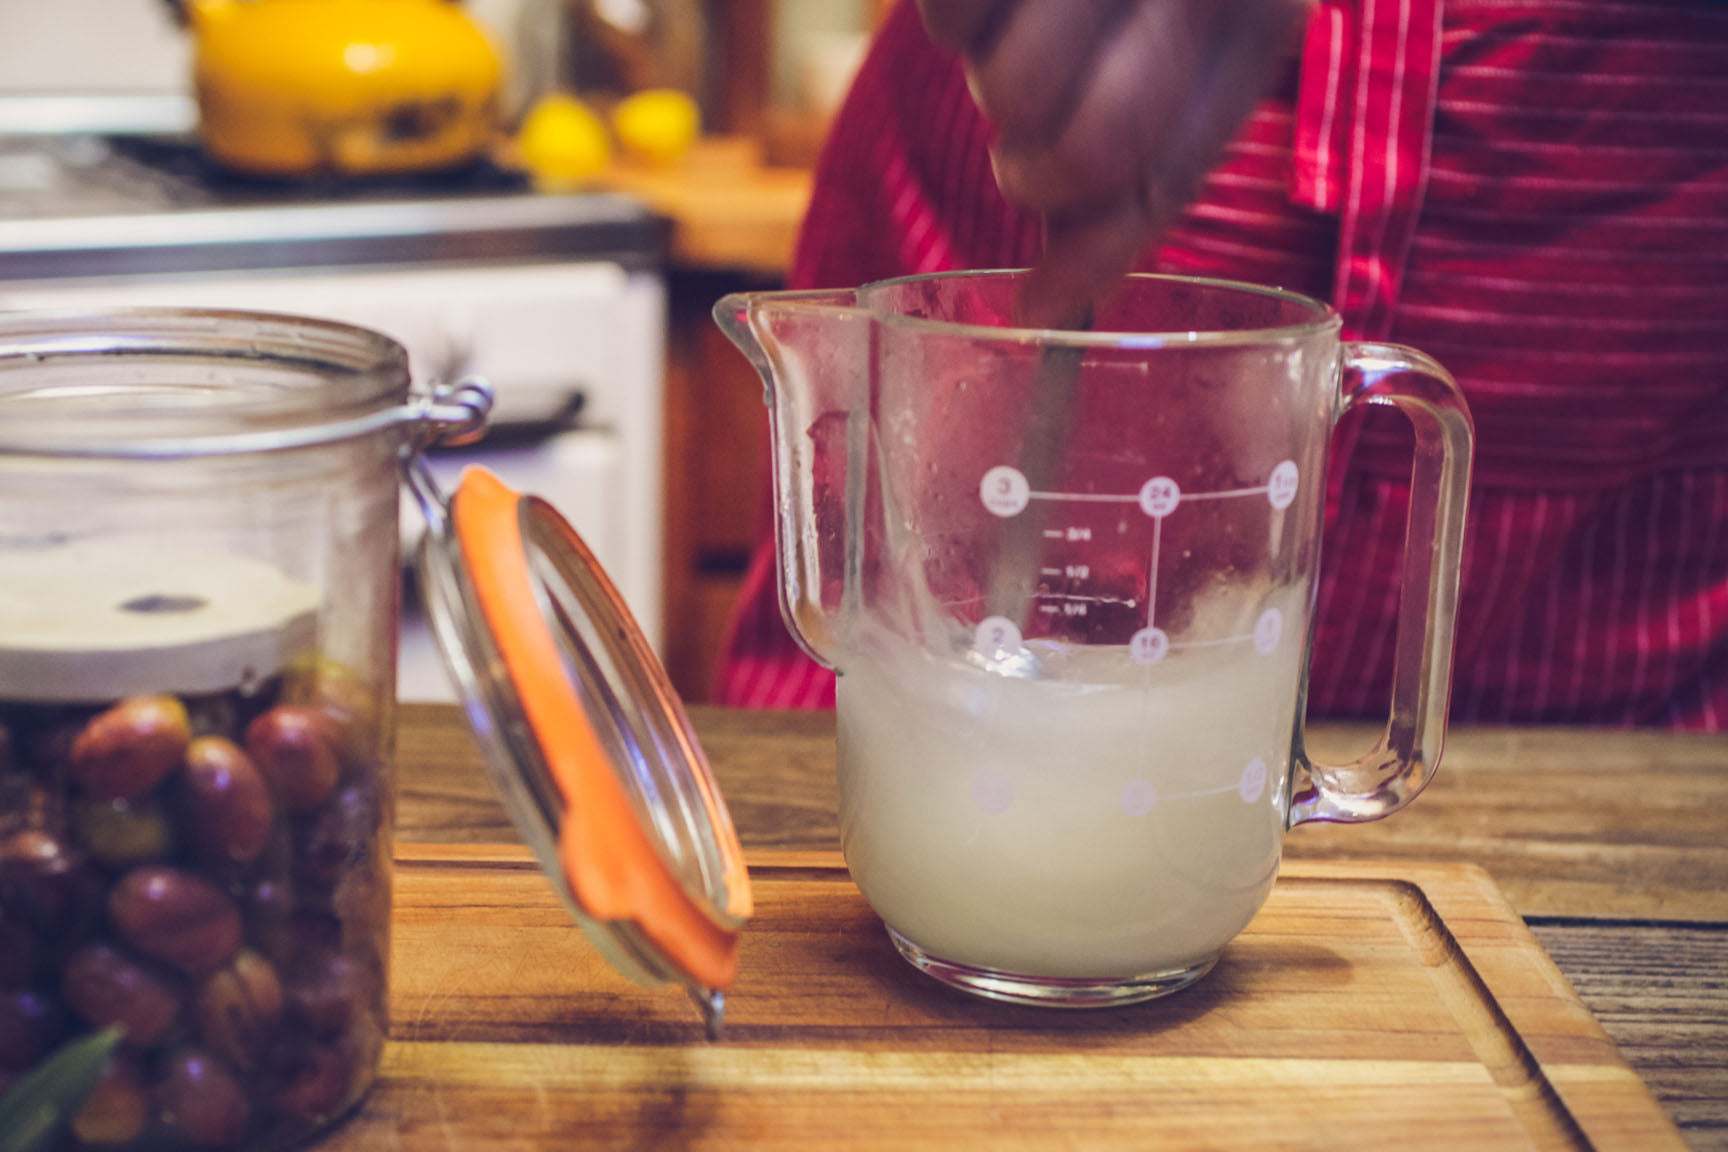
On the third day, drain the olives in a colander. Make a brine by dissolving 3 tablespoons of salt in 1 quart of water. Stir well until fully dissolved.
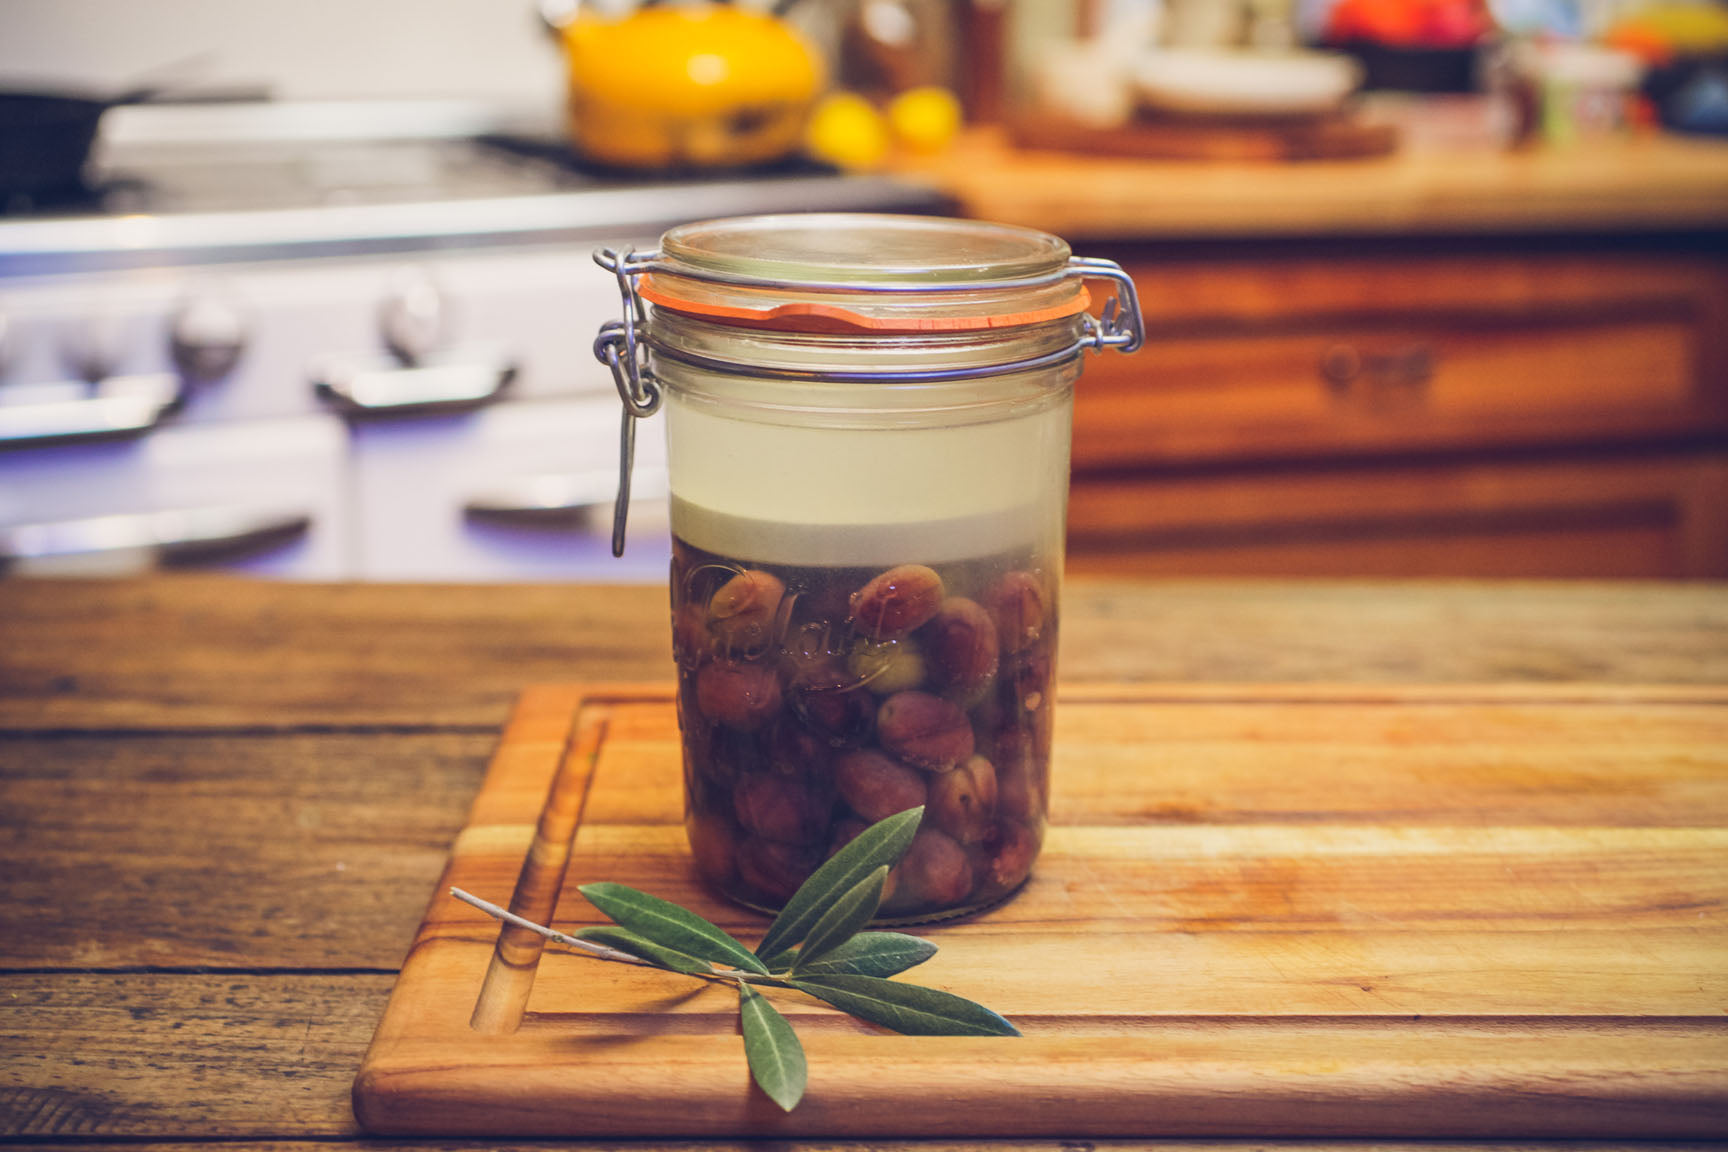
 Pour the brine over the olives, and weight them as before to keep them submerged. Leave the olives in this brine for 1 week. You can store any excess brine in the refrigerator, to use next week.
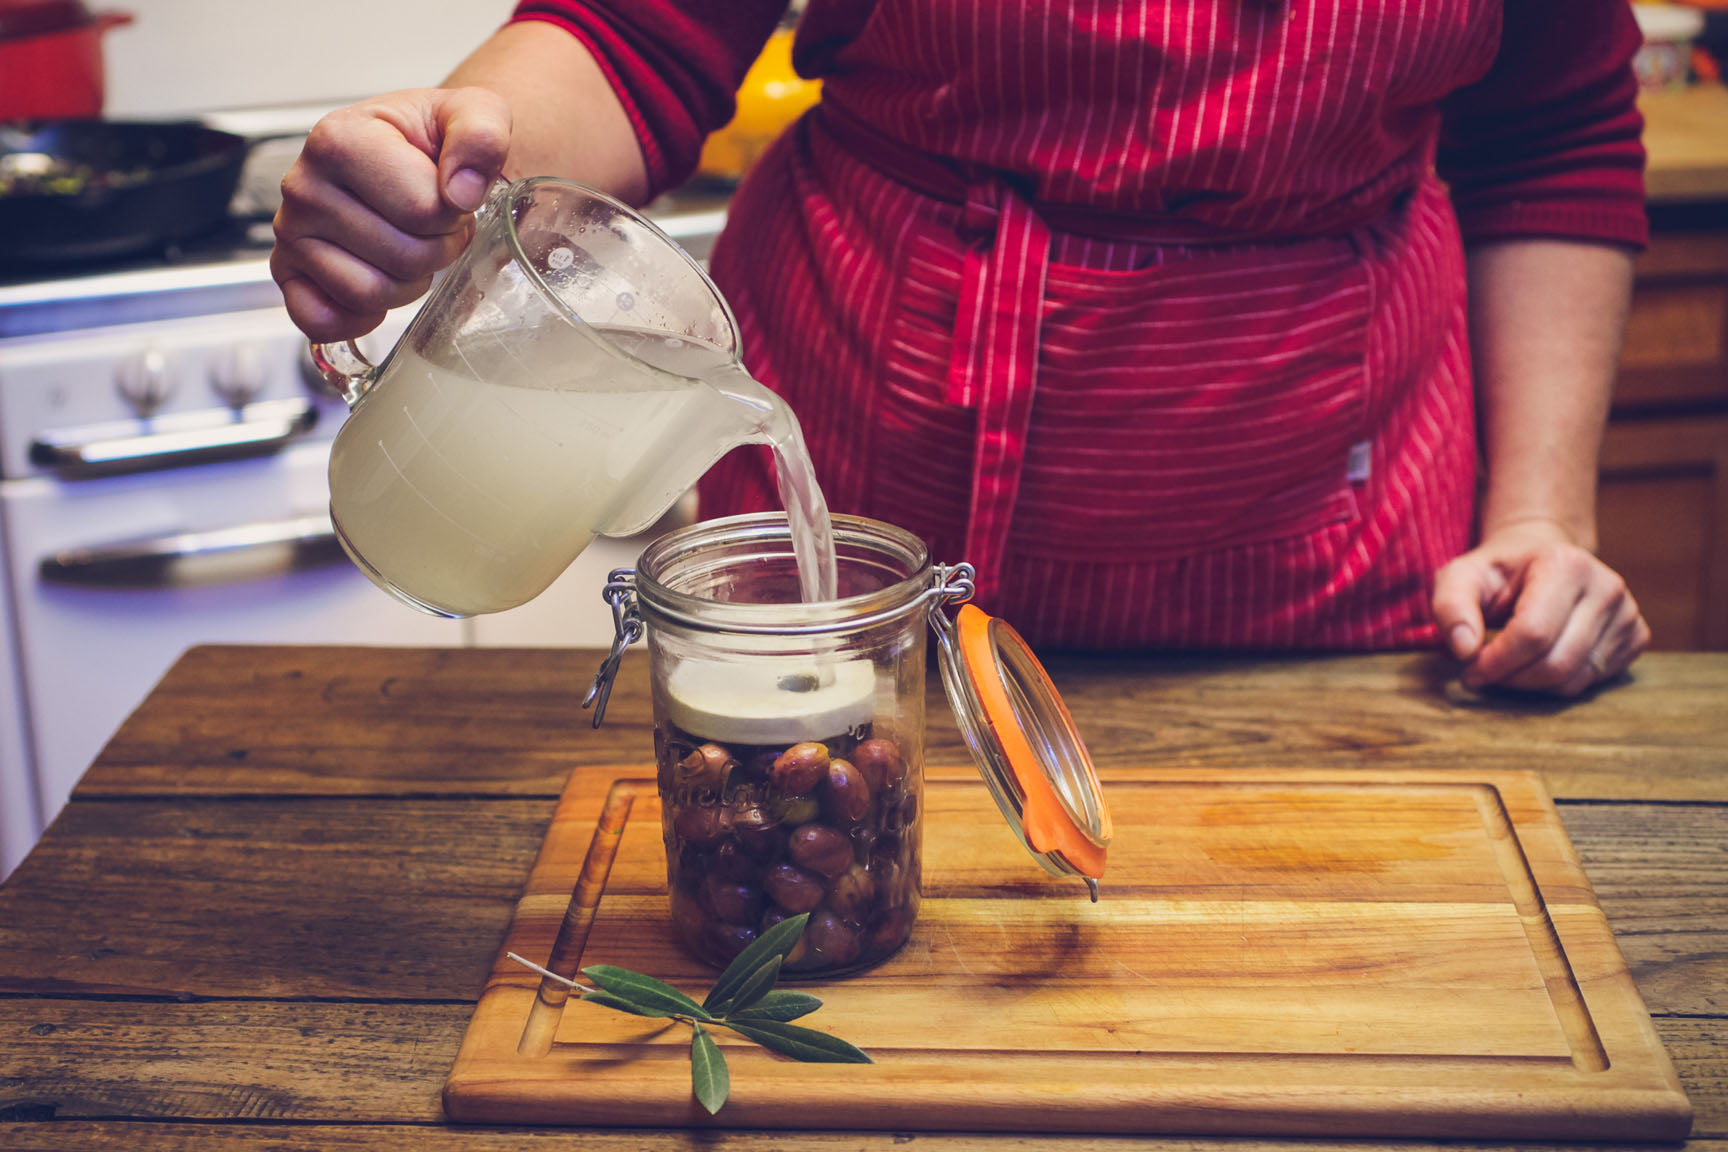
Repeat the process next week. Drain the brine from the olives, and pour fresh brine over the olives.
Repeat this process next week, replacing the second brine with fresh brine.
Drain the brine from the olives, one last time!
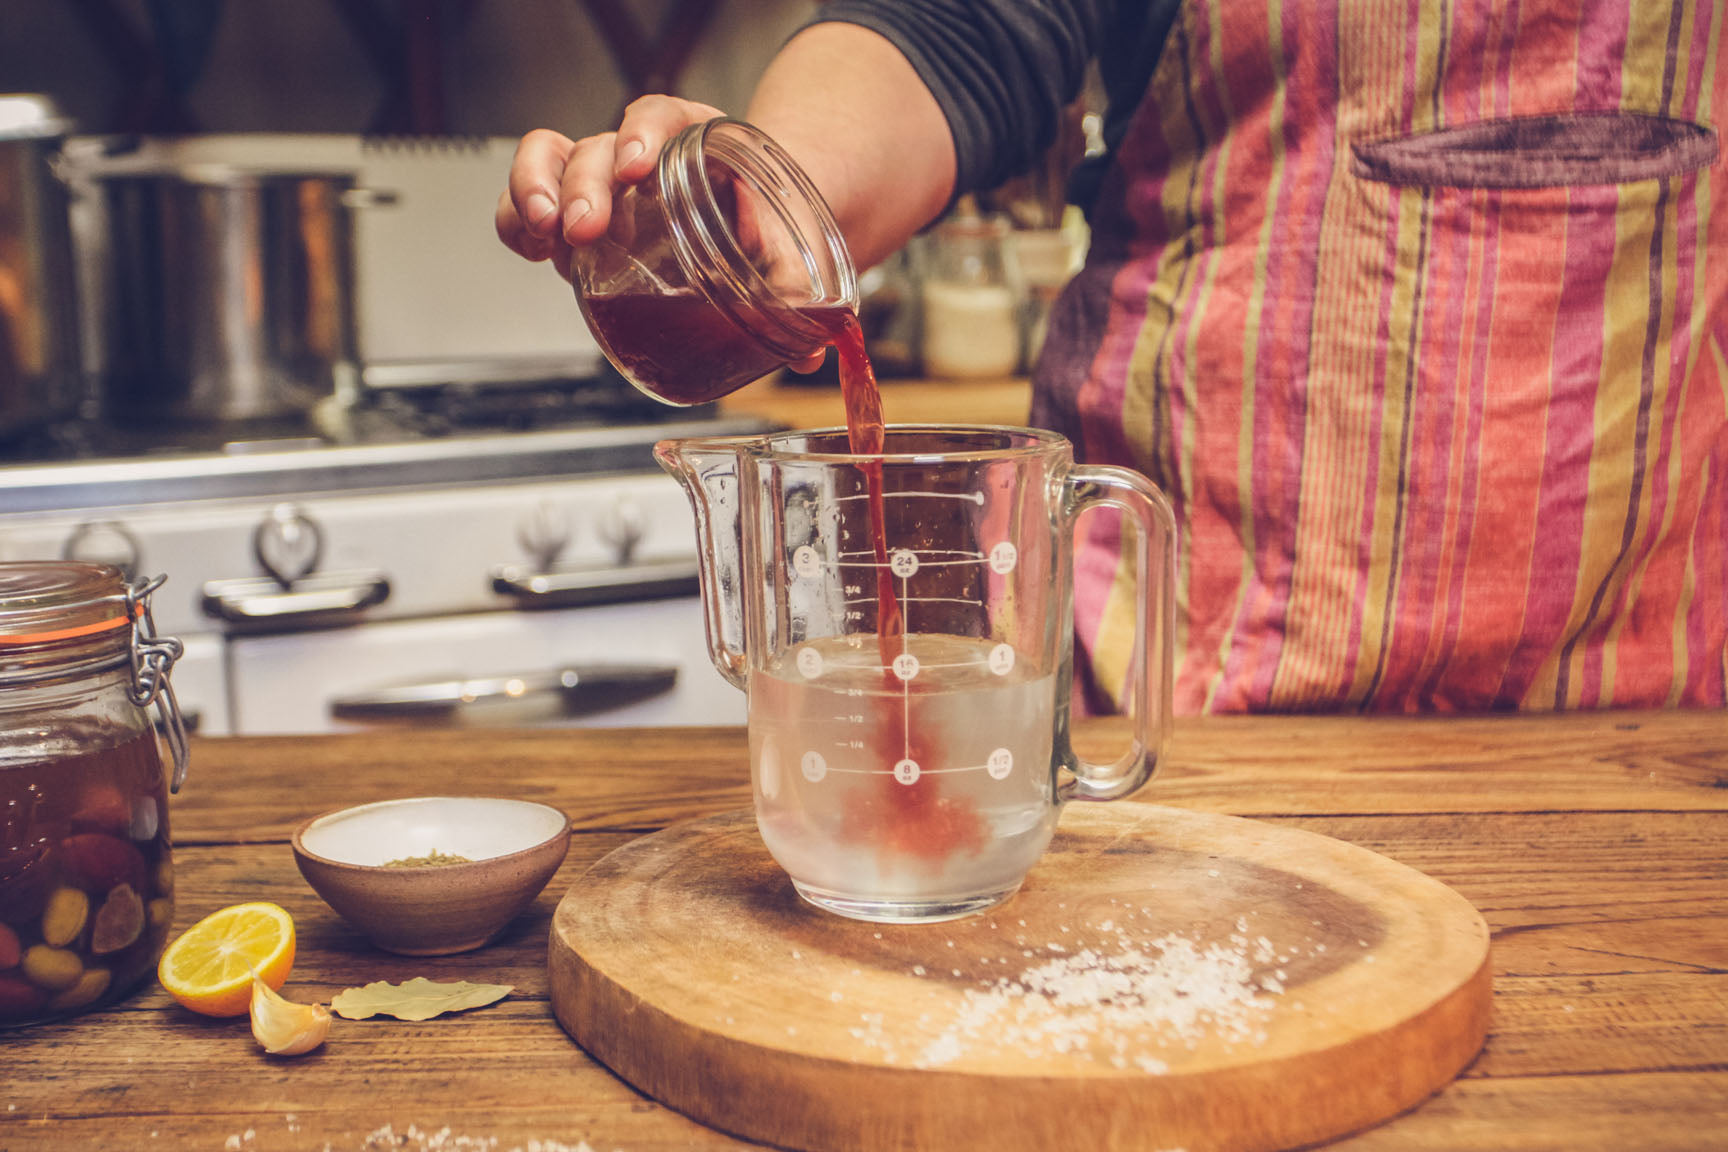
Make another brine, using the same ratio of salt to water, but in a smaller amount. (1 1/2 tablespoons sea salt to 1-pint water). If you have an extra pint of unused brine from last week, you can use that instead.
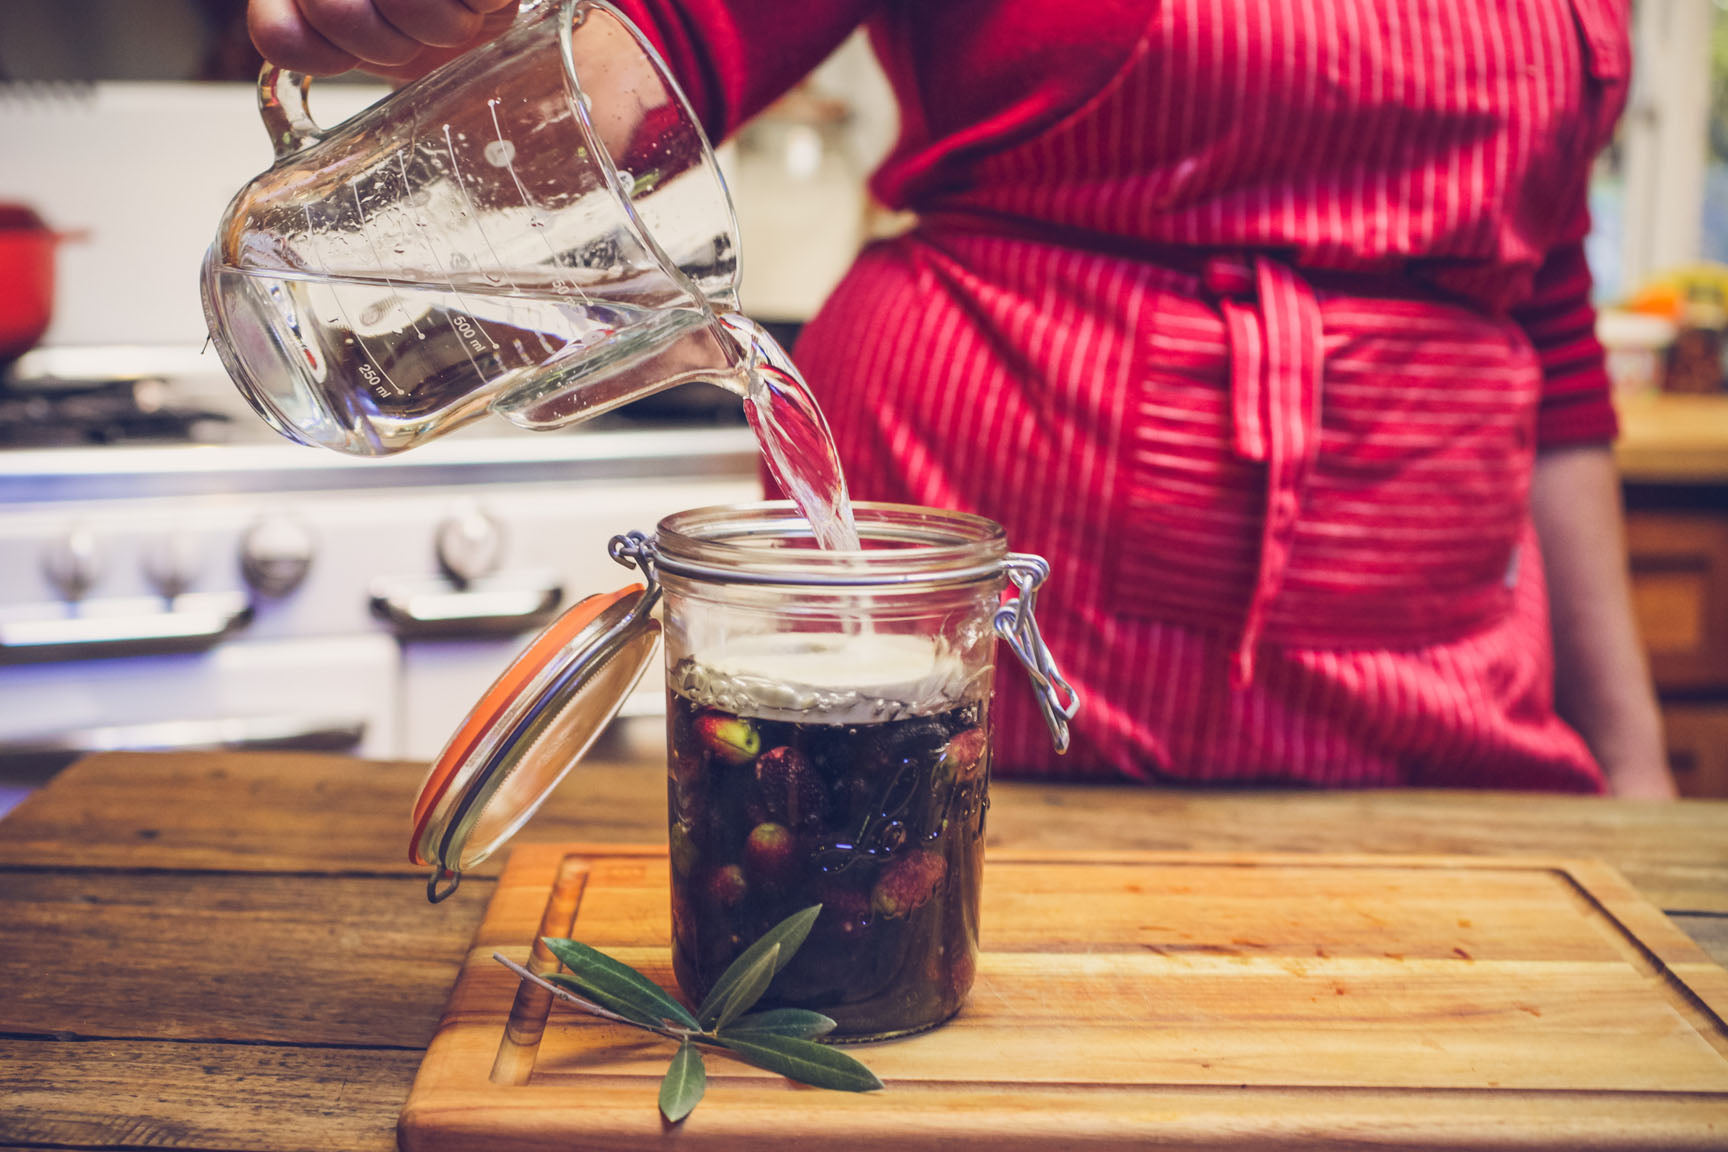
Add the vinegar to the salt brine, and stir to combine.
 Drain the brine from the olives, one last time!
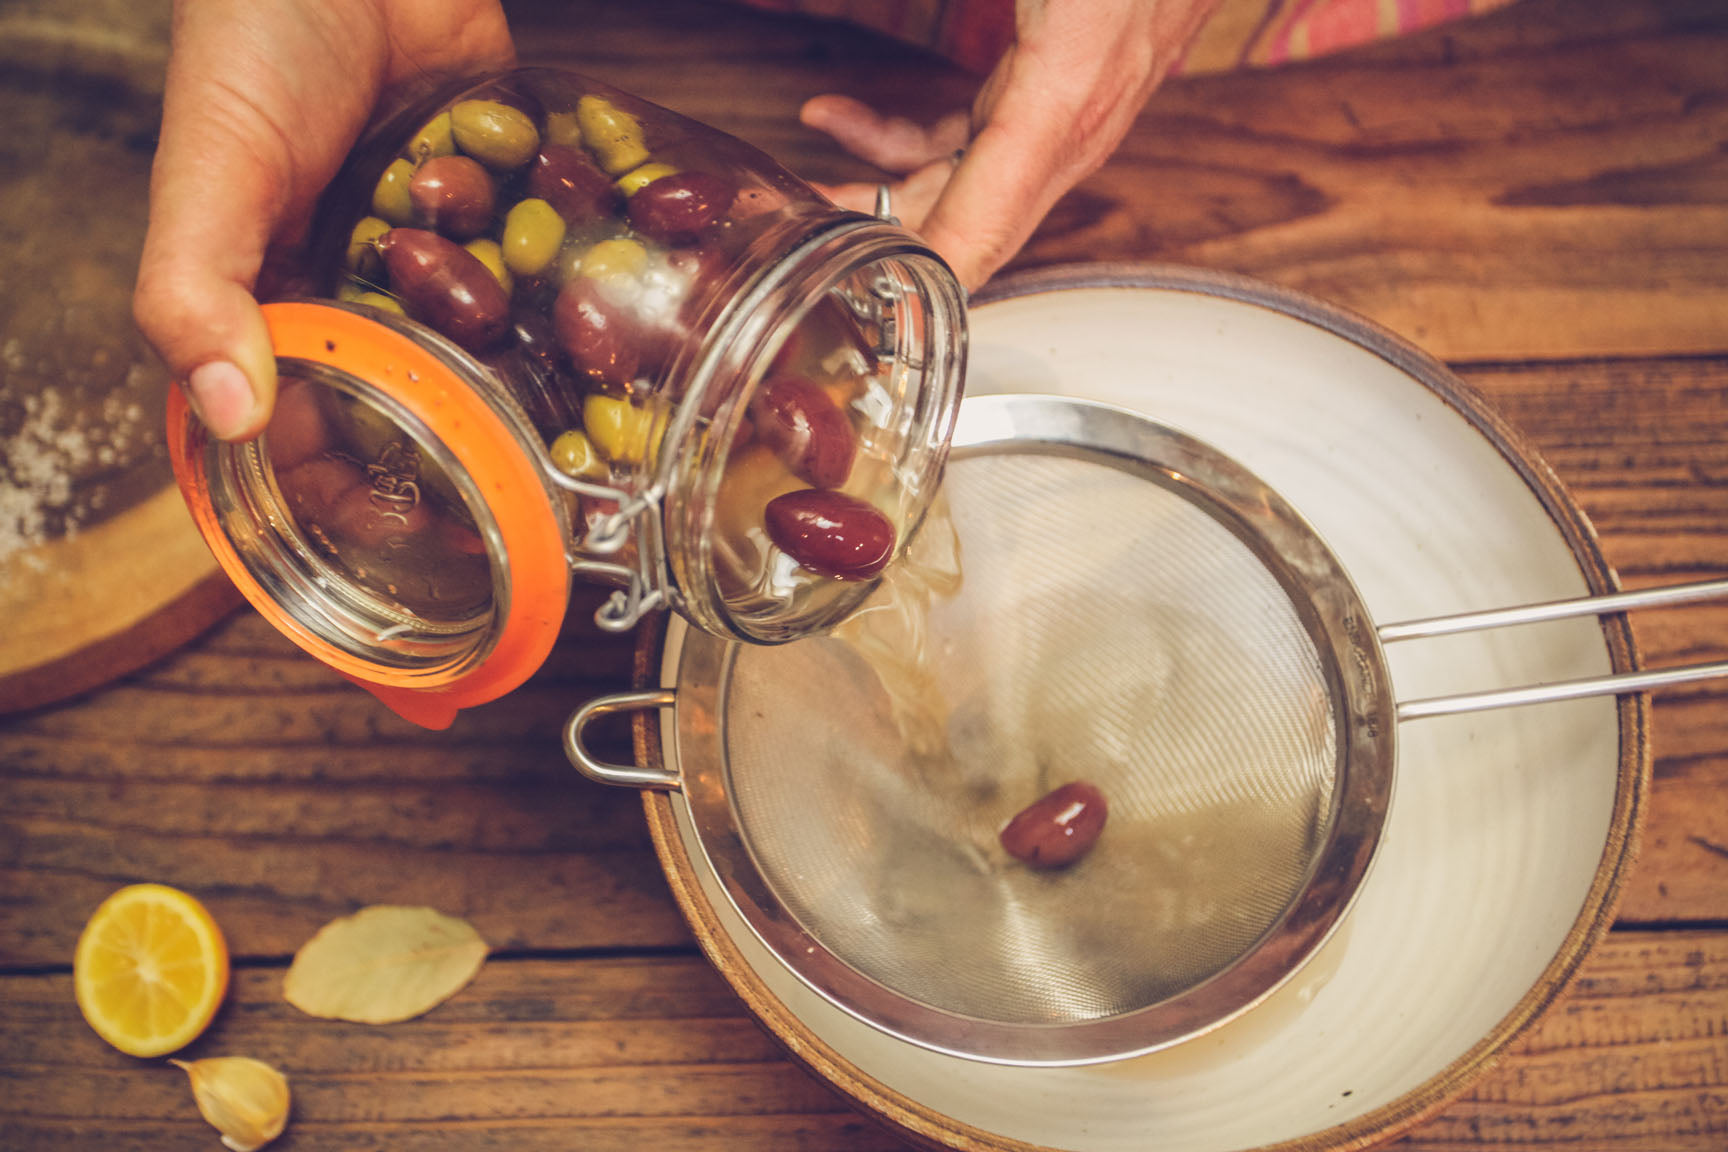 Prepare the remaining ingredients. Slice the lemon half into thick rounds, and lightly crush the garlic bulb. In the bottom of a quart jar, place the lemon, spices, and garlic.
 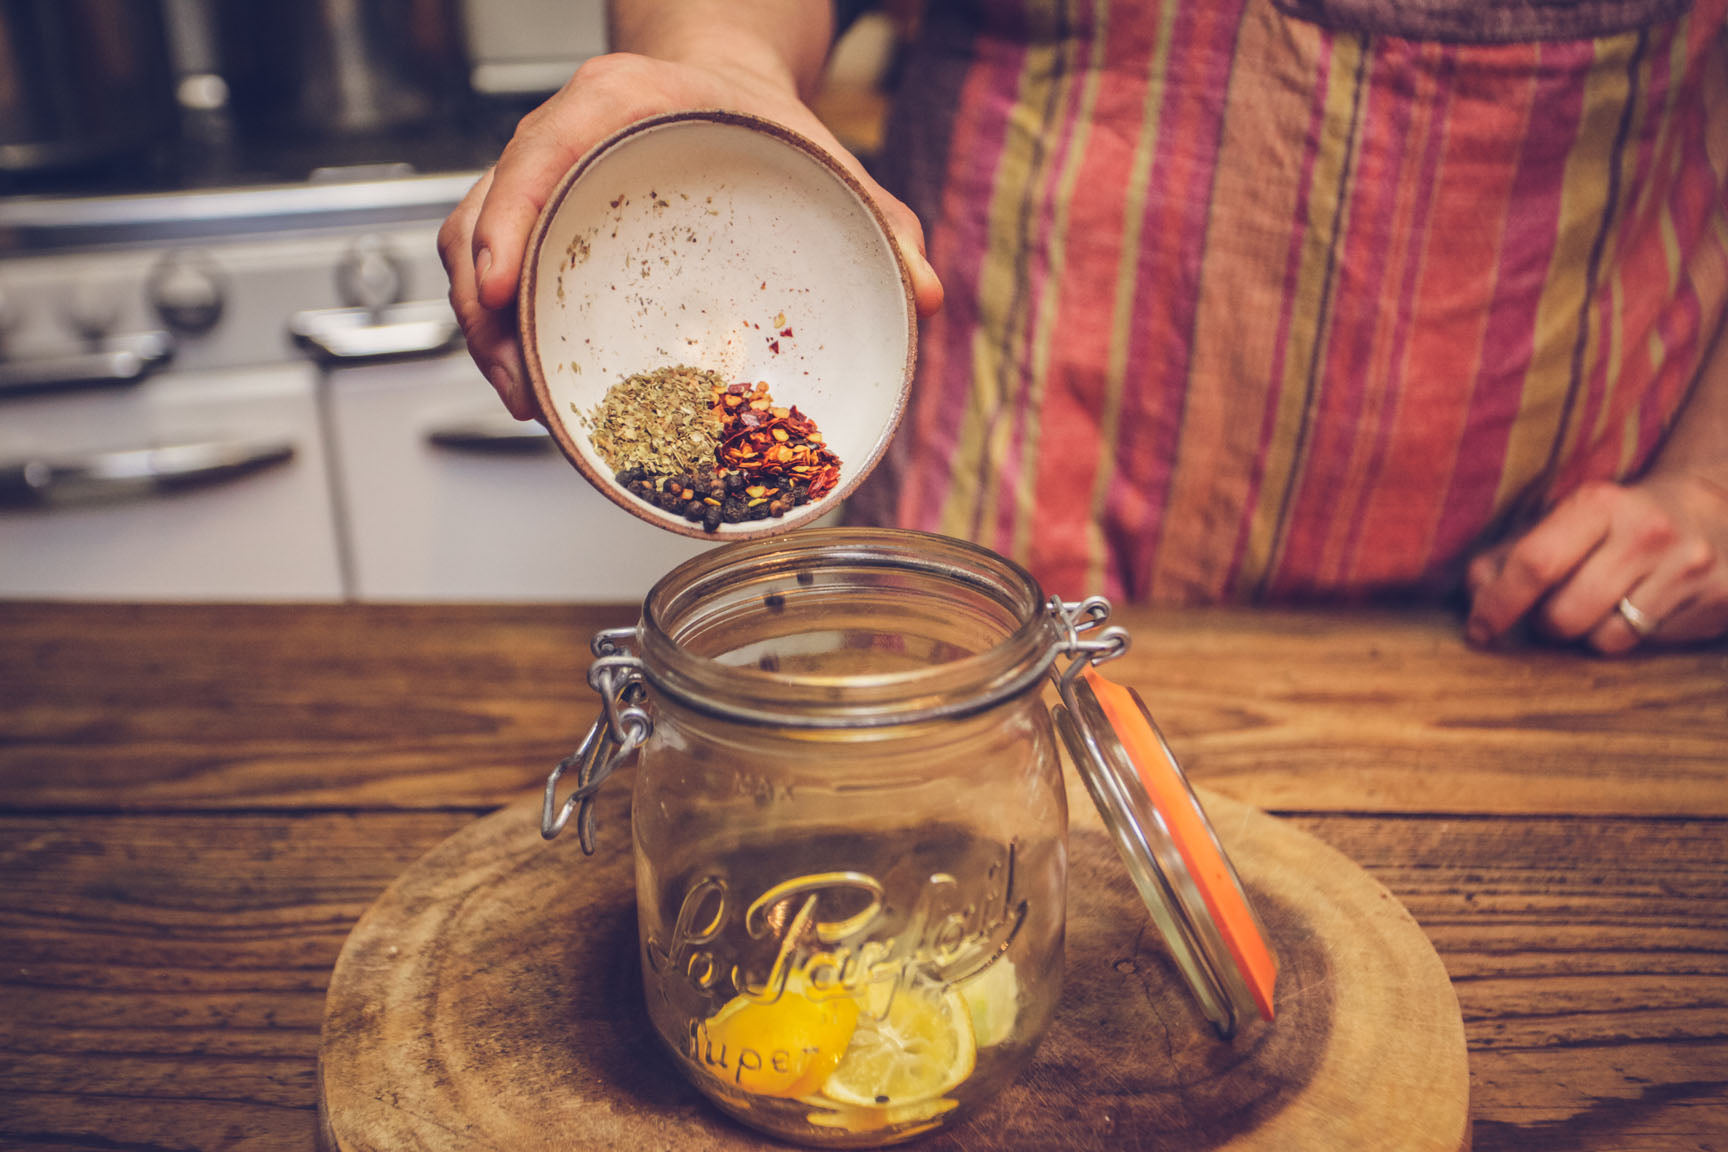 Place the olives in the jar, on top of the spice mixture. Pour the vinegar and salt brine mixture over the olives.
 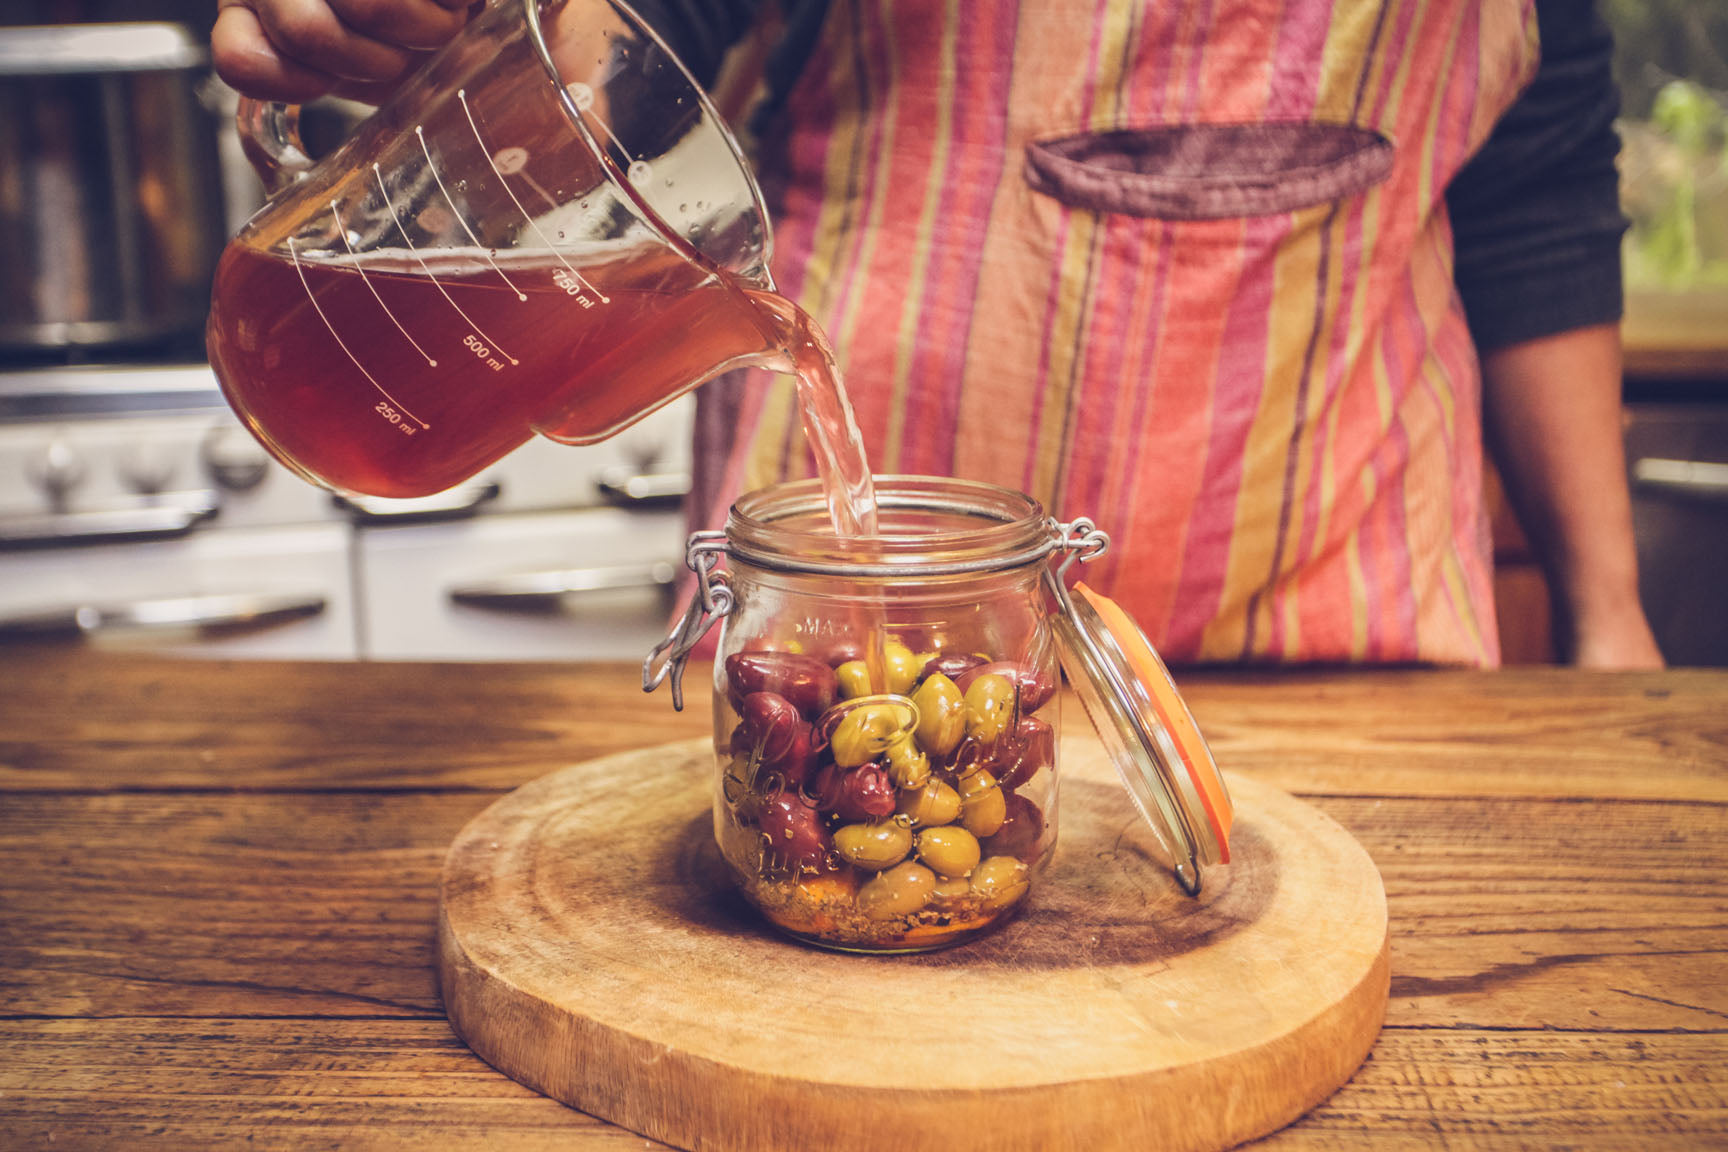 Weight the olives to keep them submerged beneath the brine. Seal the jar, and set it in a cool place.
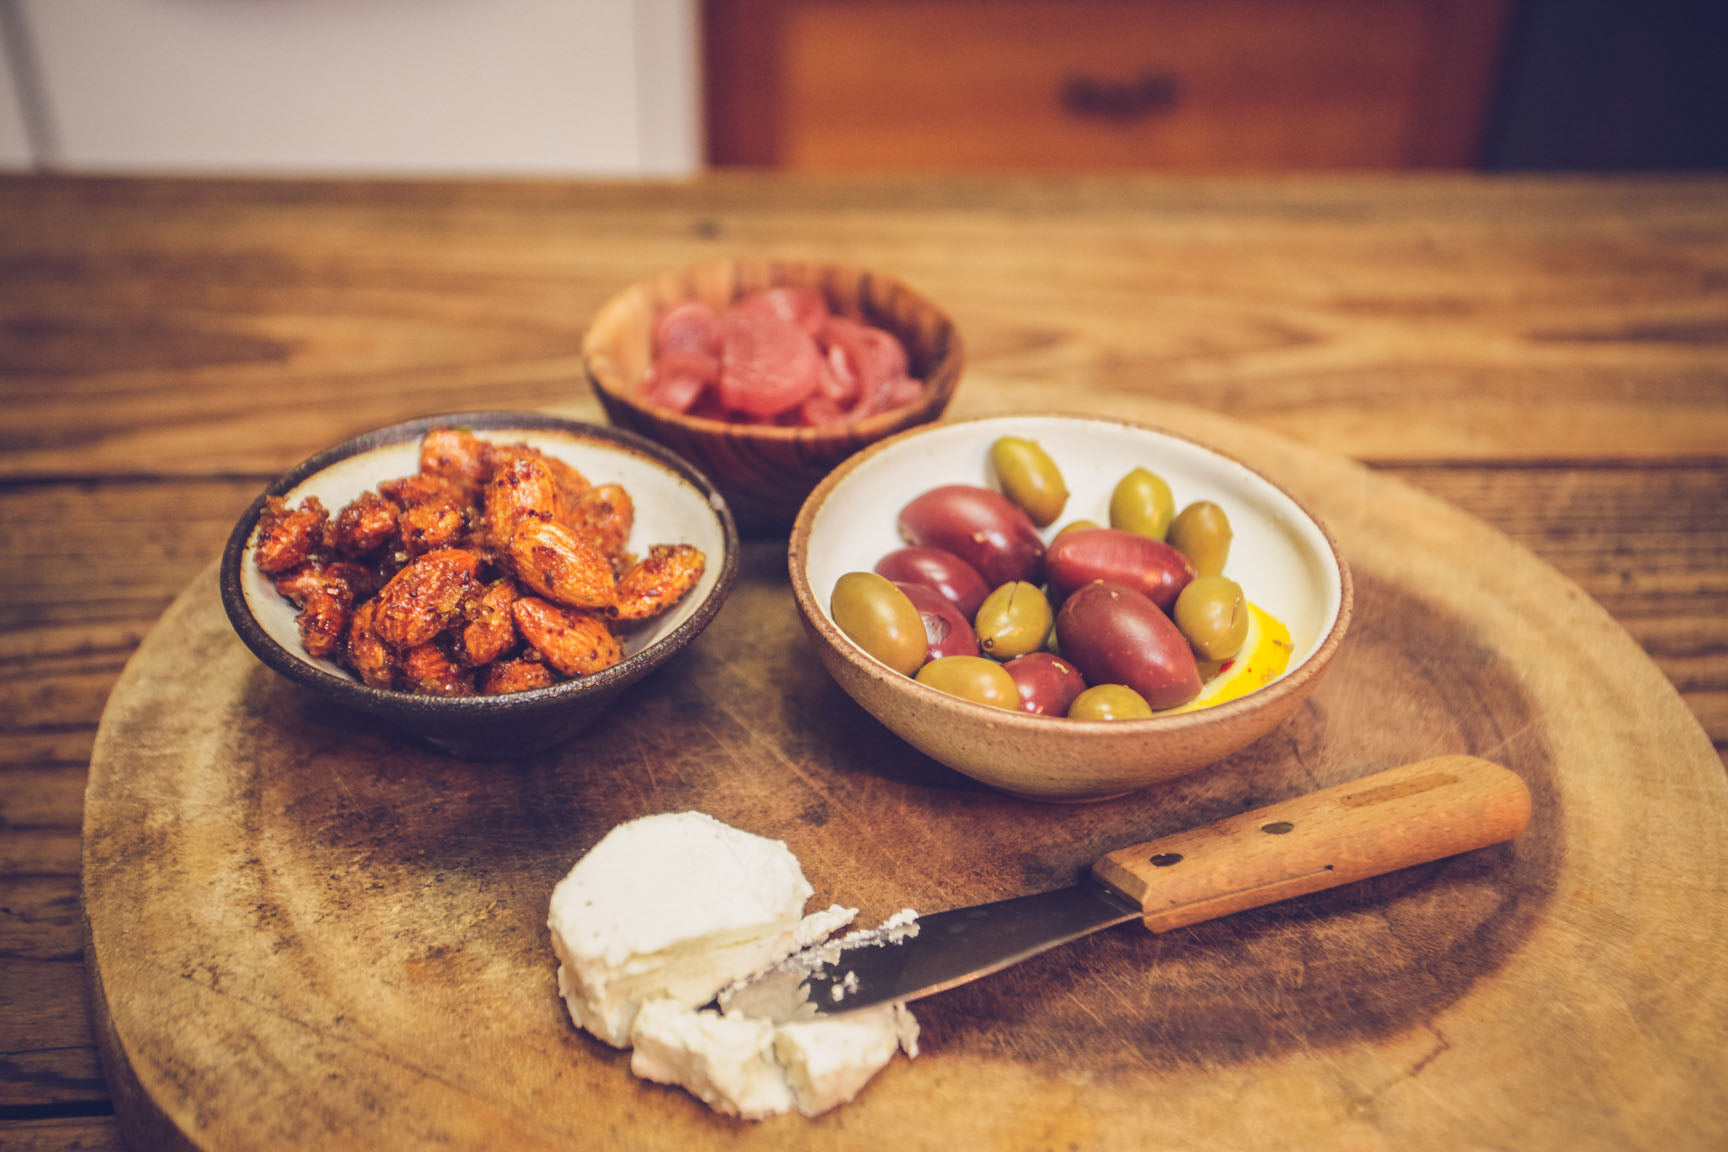
These olives can be tasted in 10 days, or left in a cool dark place for up to a year. As they age, the flavor will change, so having multiple small batches allows you to taste the changing flavors as they continue to develop. When they reach a flavor to your liking, they can be stored in the refrigerator to keep the flavor relatively stable.
Over to You
It’s part of our mission here at Mountain Feed to help you make delicious, sustainable, homemade food more often. Stop by and say hello on Facebook, Twitter, Instagram or Pinterest. Or, as always, you can do it the old-fashioned way and come by the store to speak with one of our in-house experts.