- Continue Shopping
- Your Cart is Empty
Getting Started With Water Kefir: A Non-Dairy Probiotic Beverage

What You'll Need
Equipment
- 1 Quart Wide Mouth Canning Jar
- A wooden or plastic spoon
- muslin jar cover, tea towel or cheesecloth
- rubber band or tie to secure the cover to the jar
- fine plastic mesh strainer for straining your grains from the sugar water solution
- clamp top bottles for finished water kefir
- narrow mouth funnel
Ingredients
- Dehydrated water kefir grains
- ¼ cup organic sugar
- 1 quart non-chlorinated, non-fluoridated water
If you are beginning with dehydrated water kefir grains, start here: 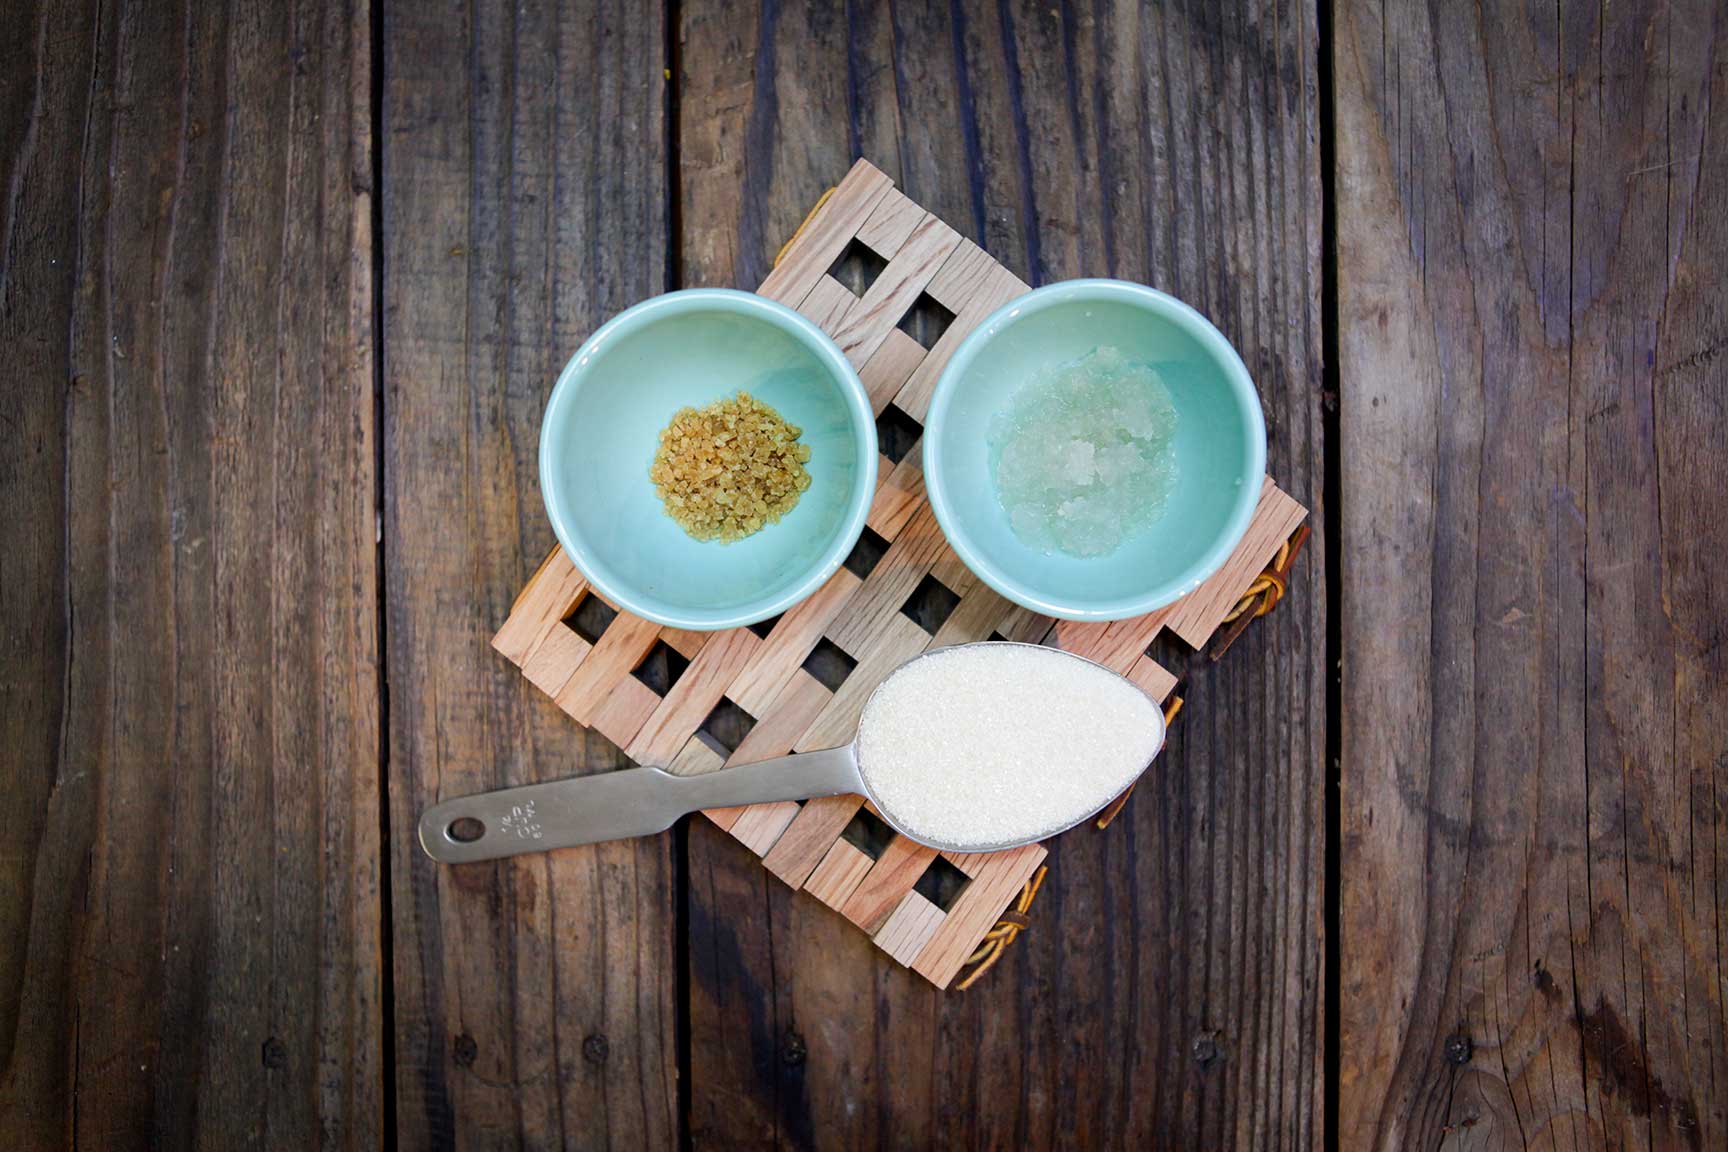
Dissolve 1/4 cup of organic sugar in 1 quart of water in a 1 Quart Jar
Cool to 68°-85° F
Empty entire packet of dehydrated water kefir grains into your cooled sugar water
Cover a muslin jar cover, tea towel or cheesecloth. Secure with a rubber band or tie
Place in a warm spot and let sit at 68°-85°F for 3-5 days
After 5 days the grains should be fat and translucent
Your grains are now ready to make your first batch of water kefir!
Strain the grains from the sugar water solution using a plastic strainer or cheesecloth.
Discard the sugar water solution.
Make Your Water Kefir
Instructions for making 2 quarts
Brew water kefir in smaller batches, as it ferments much faster than Kombucha.
Use water that has no chlorine or fluoride, as these damage the kefir grains. Conversely, distilled water does not have the minerals that tap water does, which feed the grains as well. Boil tap water to remove chlorine, or use a water filter.
1) Dissolve ½ cup sugar into 2 quarts of water
Let it cool to 65°-85° F.
2) Cover securely with a muslin jar cover, tea towel or cheesecloth.
Allow the grains to ferment at room temp for 24-48 hours.3) Prepare a fresh batch of sugar water. (see step 1 above)
4) Strain the finished water kefir into bottles
Using a plastic mesh strainer , separate the plump, translucent grains from the finished kefir. Put the grains into the fresh batch of sugar water and start over again!
By itself, finished water kefir has little flavor. It is mild and sweet and a little bland, with just a hint of sour from the fermentation. Another method brewing water kefir is to add half of a lemon and two raisins, or a fig, to the kefir with the grains in the sugar water. The fruit provides both trace minerals and a little flavor, so that the kefir can be drunk, if desired, without further flavoring. In addition, the dried fruit will sink at first, but float at the top of the jar once fermentation is complete; a friendly reminder that your kefir is done! Use a fresh batch of fruit each time, and remove it along with the grains before bottling.

Kefir grains multiply! They grow plumper, and also create new grains. You don’t need any more than a tablespoon of grains per quart to make kefir effectively, so you will have extra. This is great, because there are a lot of fun experiments to be done with kefir grains. I like to breed up a batch of grains and put them to rest in the fridge; that way, I always have a backup batch of grains should anything happen to my main supply. Then, when there is another tablespoon to spare, I like to experiment with different methods of brewing. Some folks swear by coconut water kefir; others like to culture the grains directly in juice. These alternative mediums may produce delicious results, but often over time, the grains themselves may lose vigor and begin to shrink or disintegrate. This is due to incomplete nutrition in the brewing liquid, or from too much acidity. If you love these alternate brews, we recommend alternating every other batch of juice-cultured or coconut-cultured kefir with plain sugar water. The grains will renew and replenish themselves in the sugar water, and be ready to culture more goodness for you in the future!
Flavoring and Carbonating Your Water Kefir: Secondary Fermentation
Well, now you’ve done it. You’ve brewed up a batch of probiotic goodness and you’re ready to bottle it!
Use a narrow mouthed funnel to pour the finished liquid into airtight, clamp-top bottles. How, and if you flavor them, is up to you. A good general rule is 10-30% juice or other flavoring; make sure to leave enough room to add flavoring juice.
Sharp, citrus flavors tend to work well with kefir’s inherent mellow sweetness; think grapefruit, tangerine, etc.
Ginger is another flavor that works well with water kefir; simply grate it finely with a Microplane and squeeeeeeze the pure juice out, or brew it into a strong tea to add to the finished liquid.
Fill the bottles up to within a 1/2 inch of the top and clamp them shut. Let them sit on the counter at room temperature for another 1-3 days. The liquid is still microbially active at this point, so it is still creating C02 as it continues to digest the sugars in your brew. However, since the clamp top is closed, the C02 is trapped inside the liquid. When the bottles are opened, C02 comes out of solution-viola, bubbles!
Test the bottles periodically to determine when they have reached the level of carbonation you desire. Remember that fruit juice contains sugar, natural or no, so fermented beverages that have been flavored with a higher percentage of juice will likely ferment faster than those with less.
When the secondary fermentation is complete, just put the bottles in the fridge. The cold inhibits further fermentation.
Over to You
It’s part of our mission here at Mountain Feed to help you make delicious, sustainable, homemade food more often. Stop by and say hello on Facebook, Twitter, Instagram or Pinterest. Or, as always, you can do it the old fashioned way and come by the store to speak with one of our in-house experts.
Keeping a great journal leads to delicious results! Get inspired by new recipes, expert articles and homemade food adventures in our Monthly Journal.