- Continue Shopping
- Your Cart is Empty
How to Easily Make Kombucha at Home

A Brief Overview
If you have a friend who makes kombucha, it is likely you can get a SCOBY from them. As the mother grows, new layers are continuously formed on the top of the liquid. It is easy, even advisable, to pull the freshest layers off and use those to ferment new batches.
The older layers can also be reused, to start a new batch, and they in turn will continue to create fresh new scoby material.
If you do not have a friend with a SCOBY, we have options for you. We sell a fresh, ready-to-use SCOBY here at the store, for which you must only provide the sweetened tea and a container to grow it in.
Another option is a Kombucha Kit which we also carry, which includes a SCOBY, tea, jar, sweetener, thermometer, and everything else you'll need. In either case, the basic steps are as follows...
Kombucha Basic Directions
1) Brew Some Tea
Black tea is traditional, but green tea is also an option. The important thing is that the tea be free of oils, in the form of added flavors, which can smother the scoby. Oolong and Ceylon are good choices, but Earl Gray, or even my favorite Blackberry Sage Tea, both contain oils that are no good for your kombucha mother.
Tasty as these flavors are, they are best added after the primary fermentation, when the SCOBY has been removed. A one gallon batch of tea might require 2 TBS. of loose black tea, or about 8 teabags.

2) Sweeten the Tea
You will use more sugar than a health-conscious person like you is probably used to putting in your tea; about a cup of sugar for a 1 gallon batch.
I just remind myself that the majority of the sugar is being digested by the bacteria and yeast. Do not use honey, as it's natural antibiotic properties will interfere with the growth of the SCOBY. Dissolve the sugar into the tea, and allow it to cool to room temperature. If you have a little remaining kombucha left over from your last batch, you may leave it in the bottom of the jar, as a kind of kick-start to the next ferment.
TIP: If you are starting with a dehydrated SCOBY, it is advisable to add 2 cups of distilled vinegar to the first batch of 'buch. This will acidify the liquid enough to ensure that only the desired organisms inhabit your kombucha. Once the mother rehydrates and gets going, it will essentially produce it's own vinegar.
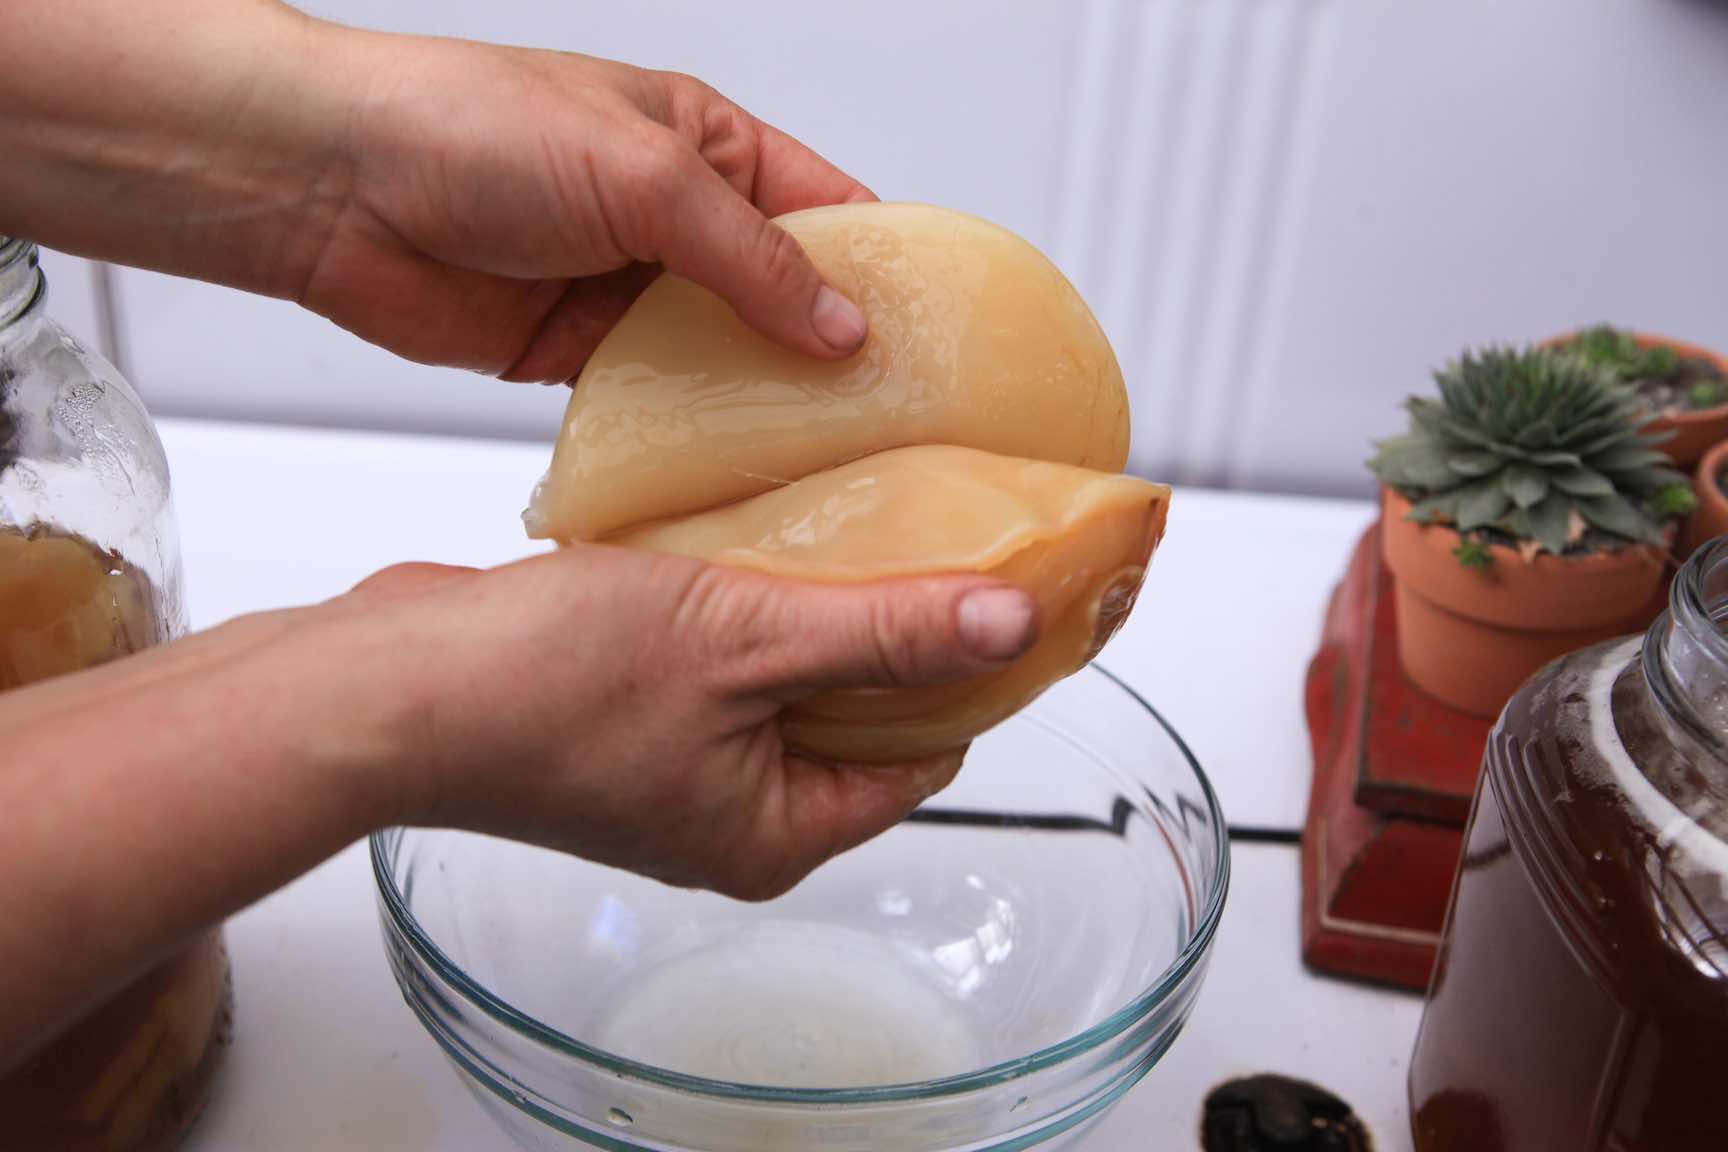
3) Add the Mother/SCOBY
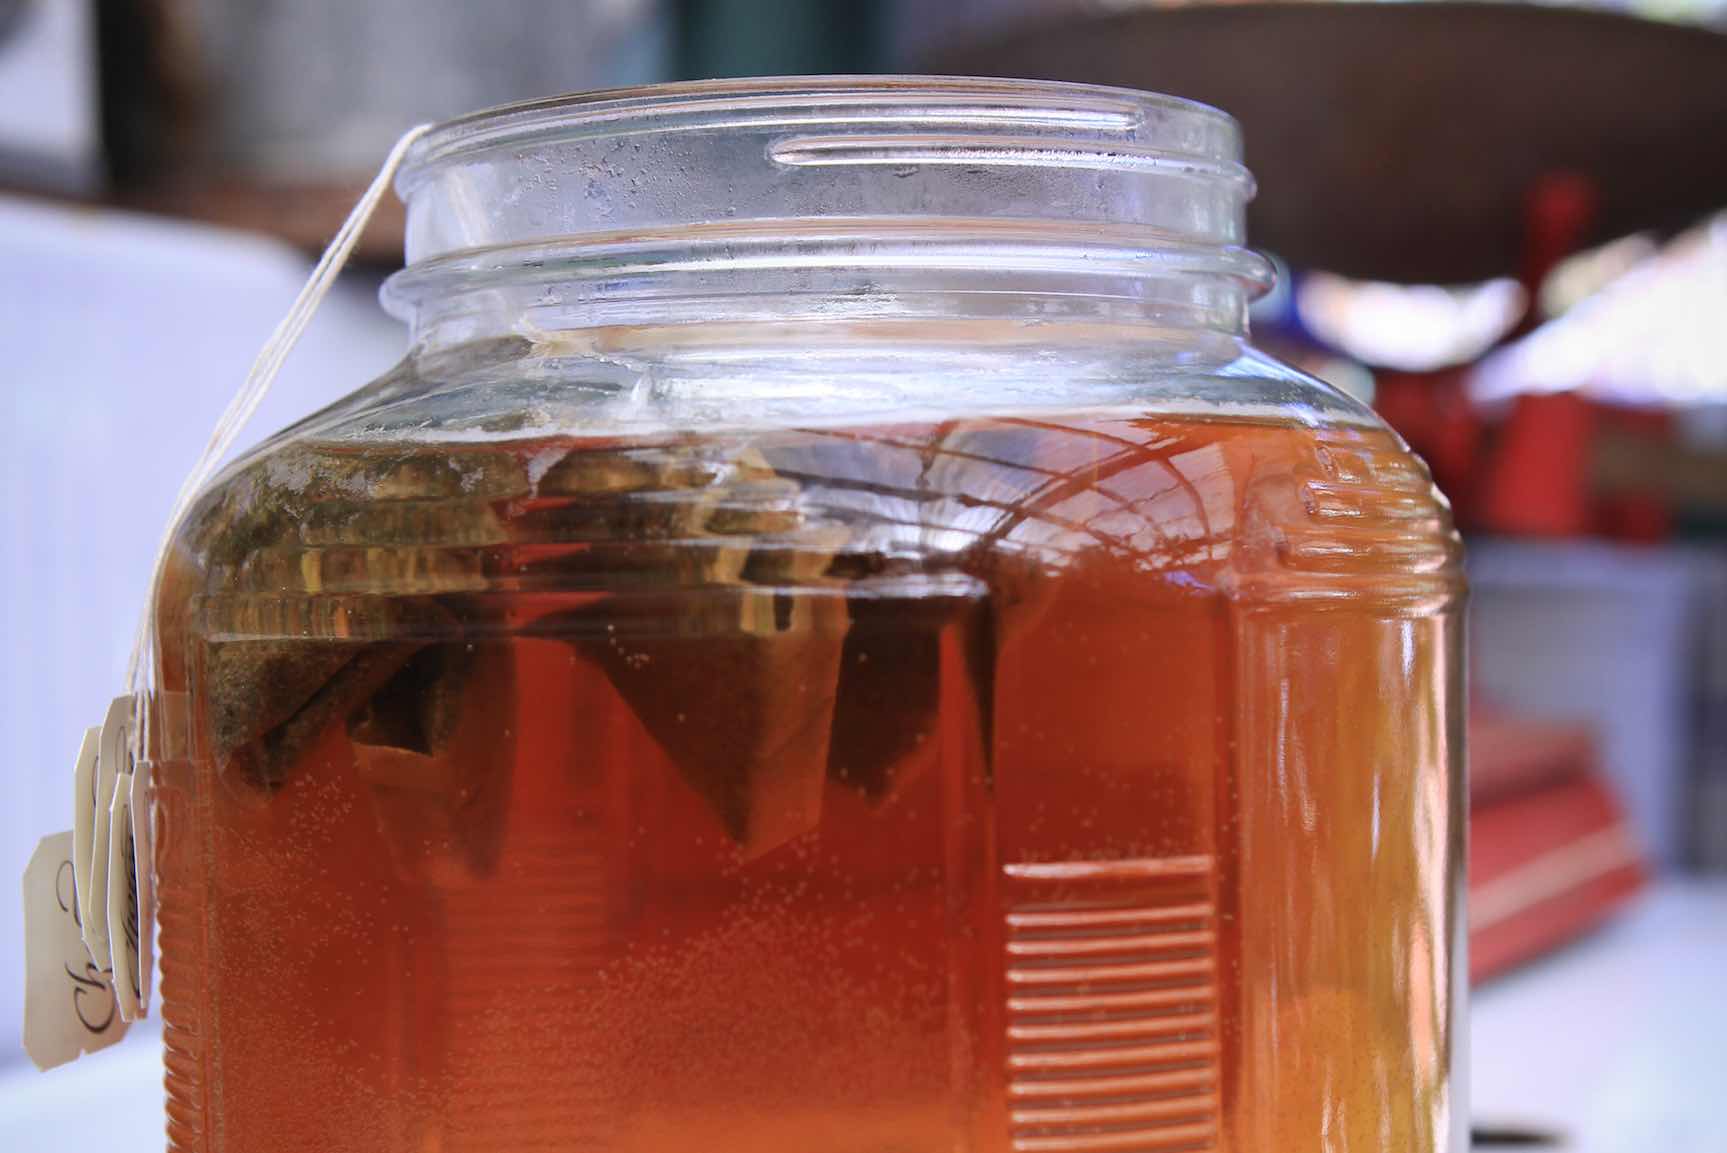
Place the SCOBY on the top of the sweetened, cooled tea. It should float on the surface of the tea. However, sometimes it sinks, and that is ok too. It might sink if the temperature difference is too great. Or if, in peeling off a previous layer, the scoby has become unbalanced.
If it sinks to the bottom, proceed as usual. It may float back up to the top, or it may do its work from the bottom. If it stays submerged, a new scoby will form up at the top of the tea within a few days.
4) Cover the Jar
Use cheesecloth, or a paper towel, secured with a jar ring, or a rubber band. This will keep out dust, wild yeast, and other contaminants, while allowing your ferment access to oxygen. Let it sit at room temperature, out of direct sunlight. A warmer ferment will go faster, a cooler ferment, slower.
After 10 days, you will want to test the flavor, or the pH. This step is known as the primary fermentation.
5) Let it Ferment to Preference
When the kombucha has reached an acidity and a flavor that you like (usually about 10-15 days into a ferment) it is time to make some decisions about how (or if) to flavor it further.
If you enjoy the taste of the kombucha plain, you can drink it as is, or, for a carbonated beverage, simply decant the kombucha liquid into a clamp-top bottle and let it sit out on the counter for 12-24 more hours. (Check it after 12 to see if it is carbonated enough or needs the extra time.)
After this period the kombucha should be refrigerated; the cold halts the activity of the bacteria and yeasts, effectively stopping the fermentation, as long as it is kept cold. This process is known as the secondary fermentation.
If you prefer a flavored kombucha, now is the time to add fruit juice to the bottles in order to flavor the brew. Many fruit juices contain a fair amount of sugar, so bear this is mind as you do your secondary fermentation; a bottle with added fruit sugars has more carbonation potential than one with plain kombucha in it, and will ferment more quickly than the plain 'buch.
I find that 10-20% juice is about all that is needed, but you are free to let your own taste dictate how much juice is put in. As the microbiota still present in the liquid digest the sugars, they release C02 as a byproduct. However, unlike the previous step, where the ferment had access to air, the gasses cannot escape the enclosed environment of the bottle, and so they reside 'in solution' in the bottle.
When the bottle is opened the C02 comes out of solution and creates the bubbles. Voila, carbonation!
Get more ideas about flavoring Kombucha and other probiotic beverages here.

6) Save Some Kombucha to Acidify your Next Batch
Leave a cup or two of finished liquid in the bottom of the fermenter, or strain it and add it back to your next batch. While not strictly necessary, this makes the brew continuously acidic, so that there is no possibility of undesired bacterial activity.

7) Repeat as desired!
Some folks have 2 batches going continuously, staggered so that there is always a finished batch and a fresh batch going. You will find the rhythm that is right for you.
If you need to take a brewing break for a week or two, you can just leave the 'buch on the counter for the duration of your time away. The liquid will become more and more acidic the longer it sits. Eventually it will become nearly indistinguishable from vinegar, and can be used in the same ways; in salad dressings or in salsas, a splash in cooked sauces or stews.
If you plan on taking a break of several months, just brew up a small, fresh batch of sugar tea for the mother and stick it in the fridge, where is should reside in stasis for many months. It will take a few days to wake back up again when it comes out of cold-storage hibernation.
Brewing kombucha is a rhythm that can fit seamlessly into even a busy life. I especially appreciate it's versatility and it's capacity for neglect.
Let it Go too Long?
Even that sour vinegar is good for many uses. (I once used old kombucha vinegar to neutralize a burn from lye! True story.) I love the infinite variety and the possibilities for experimentation.
There are so many flavors to be discovered; flavoring the kombucha is one of my favorite parts. I feel like something of a mad scientist as I experiment with herbs and juices and flavors. And brewing kombucha has taught me much about the art and process of fermentation itself, a base of knowledge that underpins so many wonderful projects, from sauerkraut to cheese to apple cider. Kombucha is a forgiving and generous teacher, tolerant of mistakes and always ready to try again.

Over to You
It’s part of our mission here at Mountain Feed to help you make delicious, sustainable, homemade food more often. Stop by and say hello on Facebook, Twitter, Instagram or Pinterest. Or, as always, you can do it the old fashioned way and come by the store to speak with one of our in-house experts.
Keeping a great journal leads to delicious results! Get inspired by new recipes, expert articles and homemade food adventures in our Monthly Journal.
Want to see more writing about Kombucha? Check out Kombucha: A Love Story.